Intro
The car that started it all… Before my 2007 Honda Civic SI, I drove a 2004 Pontiac Vibe Base. If you read that correctly, I drove it… I didn’t own it. When I got my license at 17 years old, I was a senior in high school. I didn’t have a job nor have money but I did want to have a date for Senior Prom. The day I got my license, my mind matured drastically. I was always the type of kid that stayed out of trouble and followed the rules. There was this responsibility I adapted that came with my parents handing me the keys to my mom’s red wagon.
“Now that I have a car, I need to pay for gas. Oh and prom’s coming up. I only have like $60 in my savings. I’m not going to ask my parents to pay for my ticket – ah, I have to pay for my date’s ticket too! Oh sh*t, my rental tuxedo for prom is almost $200?! My parents aren’t going to be happy about this! I need a job!”
I was fortunate enough to have a car to drive. I had a couple of options of cars to drive though; however, it was up to my parents to choose which car I was going to drive. The first option would be my dad’s 1985 Nissan 200SX – naaah that’s his baby; would he really trust me with that thing? The second option is a car I really wanted to drive: our family van, the 1999 Toyota Sienna. It would be the perfect mobile to transport me and the homies. My dad knew that I had this intention though. The last viable and sensible option: the 2004 Pontiac Vibe. My mom got rid of her late-80’s Toyota Cressida so she needed a replacement. Luckily, my Uncle Glen gifted us this Lava Red Pontiac Vibe with optional Vibe GT 17″ wheels.
Now what the f*ck is a Pontiac Vibe? Well, it’s basically a sexier Toyota Matrix in my humble opinion. There was a partnership between General Motors, or GM, and Toyota. The cars were built in the NUMMI plant of Fremont, CA – which was later sold to Tesla. The Vibe and Matrix share the same chassis, engine, and interior. The only differences would be the exterior. One advantage of the Vibe over the Matrix is the integrated roof rack and powered sunroof. Essentially, the Vibe was American on the outside and Japanese on the inside – a white-washed Japanese car… Coincidentally, the Vibe was sold in the Japanese market as the Toyota Voltz.
In contrast, the advantage that the Matrix had over the Vibe was the community. At the time I was modifying the Vibe, there were only a handful of modified Vibes vs. a wider range of modified Matrix’s. The Matrix community had enthusiasts that, I can confidently say, had more style. Fortunately, there was some cult following for the Pontiac Vibe. That’s when I became part of the GenVibe Facebook Group. After lurking the GenVibe Facebook Page and Forums, I decided to pull the trigger and buy my first set of car parts.
I want to add that buying car parts for my mom’s car seemed pretty crazy at the time. First of all, I’m spending $1,000 for BC Racing Coilovers. Second, this would make my mark as I would become a “car enthusiast”. To my naivety, I had his conception that “I’m not a car enthusiast if my car is stock”. As opposed to today, that concept does not remain true! You don’t need to modify your car to be a car enthusiast! You don’t need to drive manual to be a car enthusiast! I believe there are many levels to being a car enthusiast. As long as you have a love and appreciation for cars, you are a car enthusiast! Third, I would make my mark in a niche car community by being an active member of the GenVibe Facebook group and GenVibe forums.
My intentions in building this car were:
- Making this “everyday” car stand out and look cool.
- Raising the bar on this platform.
- Learning how to maintain and upkeep a vehicle.
- Joining a community of car enthusiasts in the Bay Area.
The Evolution of the Pontiac Vibe Base
Stage 1: Suspension drop and wheels
The first major modification a person new to the game does to their car involves either the exhaust, intake, or suspension. Whether it’s removing your muffler(s), installing a catback exhuast, cutting springs, installing lowering springs, installing coilovers, or installing a cold air intake, these are the defining moments that would either lead to financial mistakes, a new hobby, and/or love-hate relationship with cars – or maybe even all of the above.
My choice was BC Racing Coilovers. There were actually no coilovers vehicle-specific for the Pontiac Vibe. Remember how this chassis is essentially a Toyota Matrix? I went on eBay and bought a set of coilovers for the Matrix. Now, I chose coilovers over lowering springs because it was more convenient and would pay off in the long run with adjustability in height and dampening. Comparing a lowering spring setup that utilized KONI shocks and Eibach lowering springs to the BC Racing Coilover, the spring setup would’ve saved me $200. After realizing this price difference I decided to save a couple hundred more dollars and pull the trigger then.
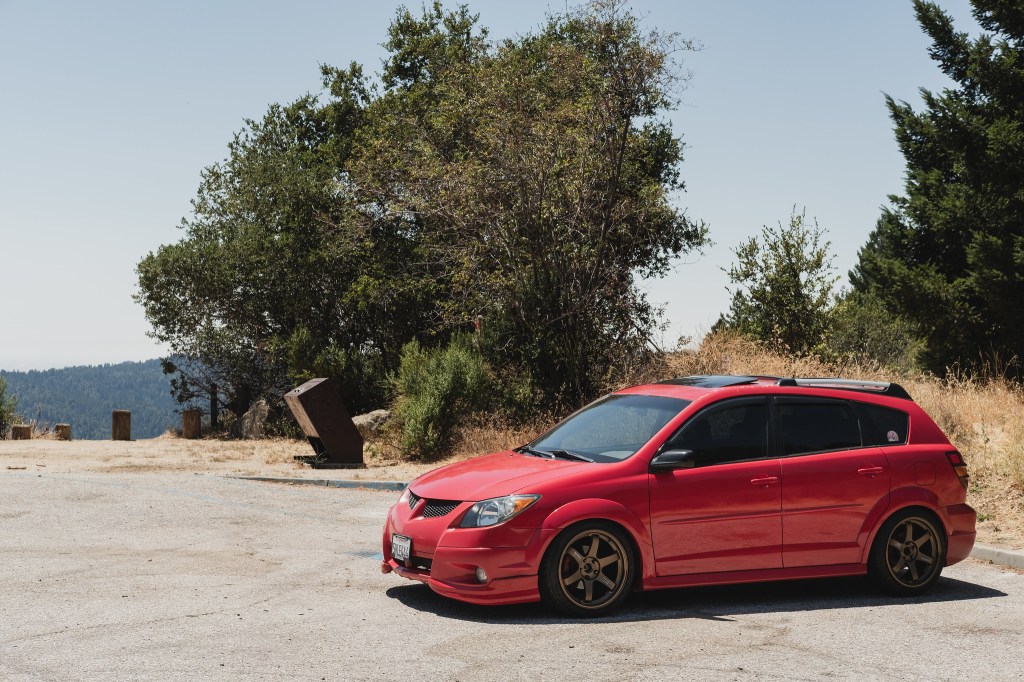
The picture above is when I had the car lowered on the BC Racing Coilover I installed with my dad. We did it in our garage with some simple hand tools, sockets, and a Milwuakee M12 3/8″ Stubby Impact Wrench. If I remember correctly, we took about 4-6 hours installing the new suspension setup. From the OEM struts to the coilovers, the initial drop was about 1.5 inches.
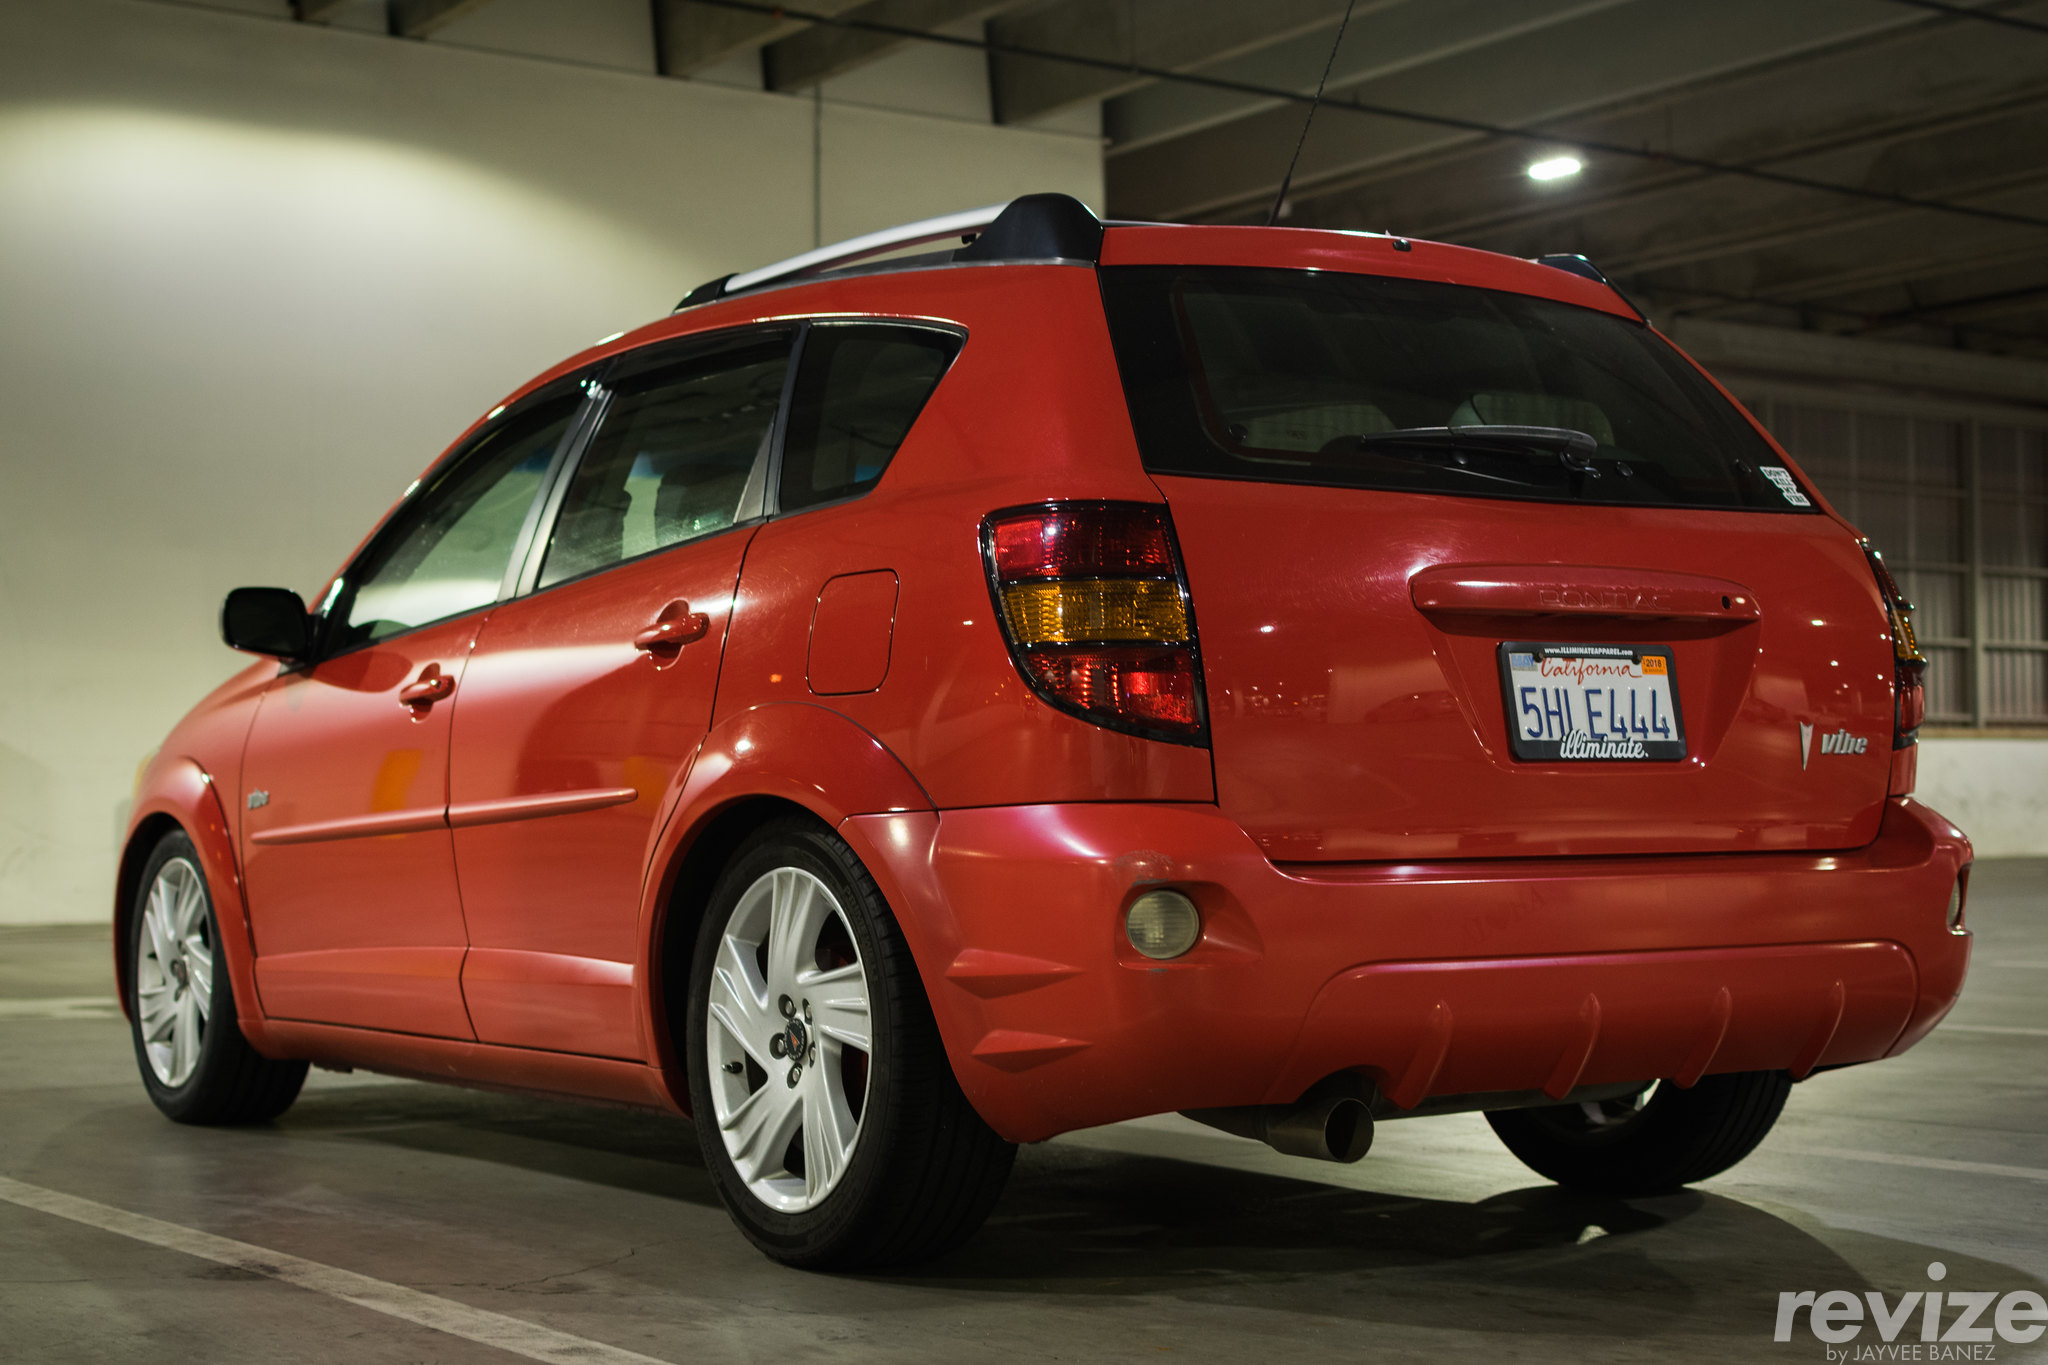
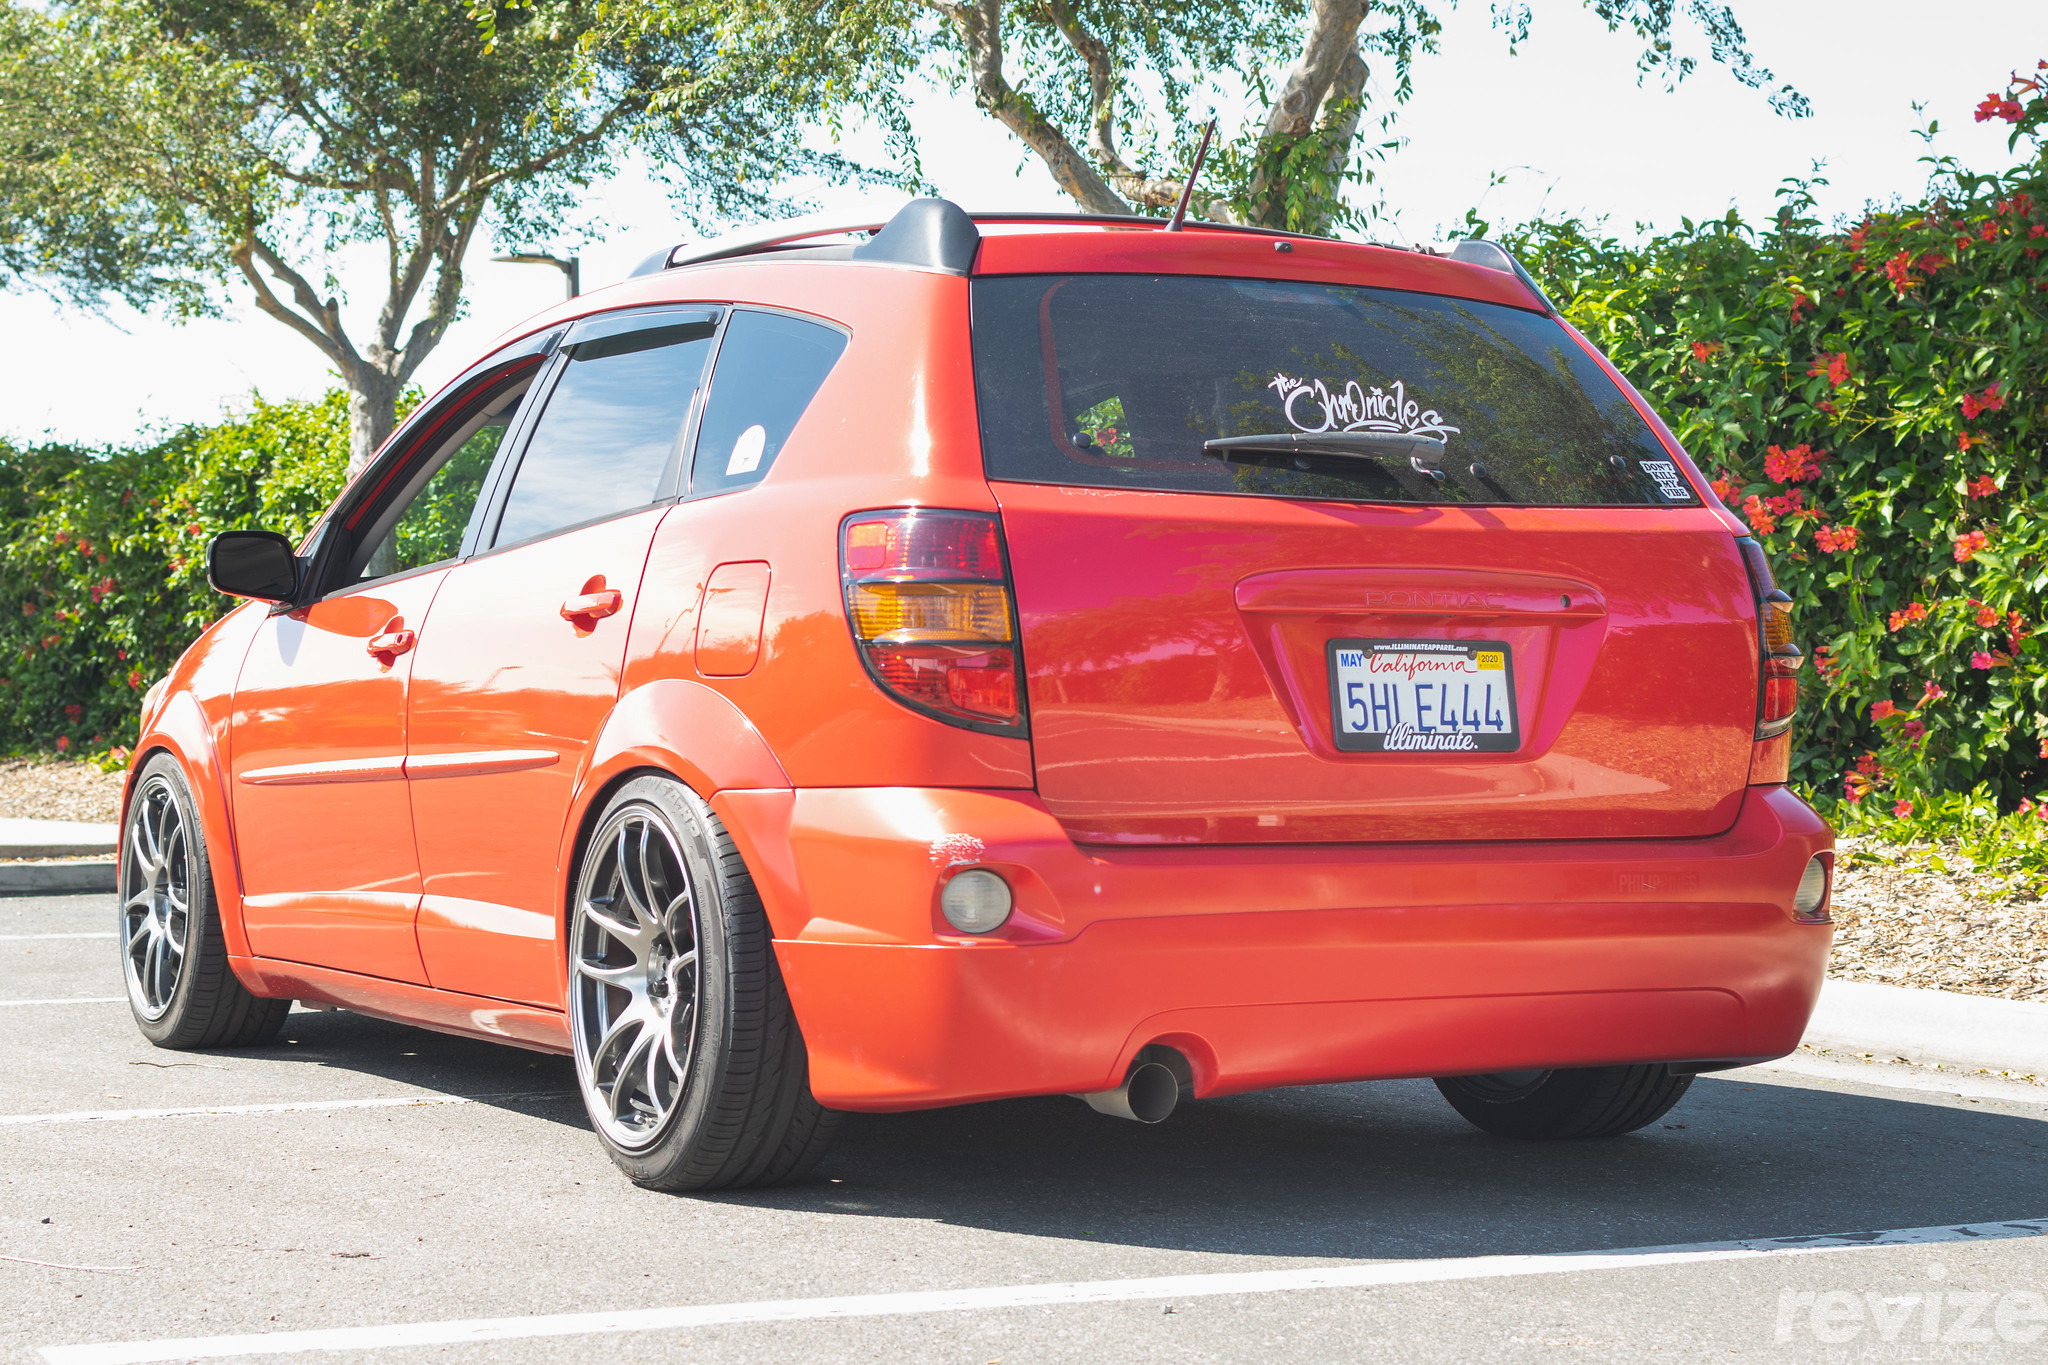
The next modification to my mom’s Vibe was a sticker tune. The main sticker is the “The “Chronicles” vinyl from Joey Lee of The Chronicles, aka “stickydiljoe”. After that, I wanted to make the rear look slightly more aggressive so I decided to wrap some of the rear bumper in black vinyl wrap. It gave it more contrast to the boring rear end of the hatchback.
A modification that did not work well was this random eBay Subaru Impreza WRX/STI lip kit. The front bumper of the Vibe was narrower and more curved than the Impreza bumper so I had to cut the lip in half in order to contour it to the Vibe. Certainly the lip did not last long because it didn’t flow well.
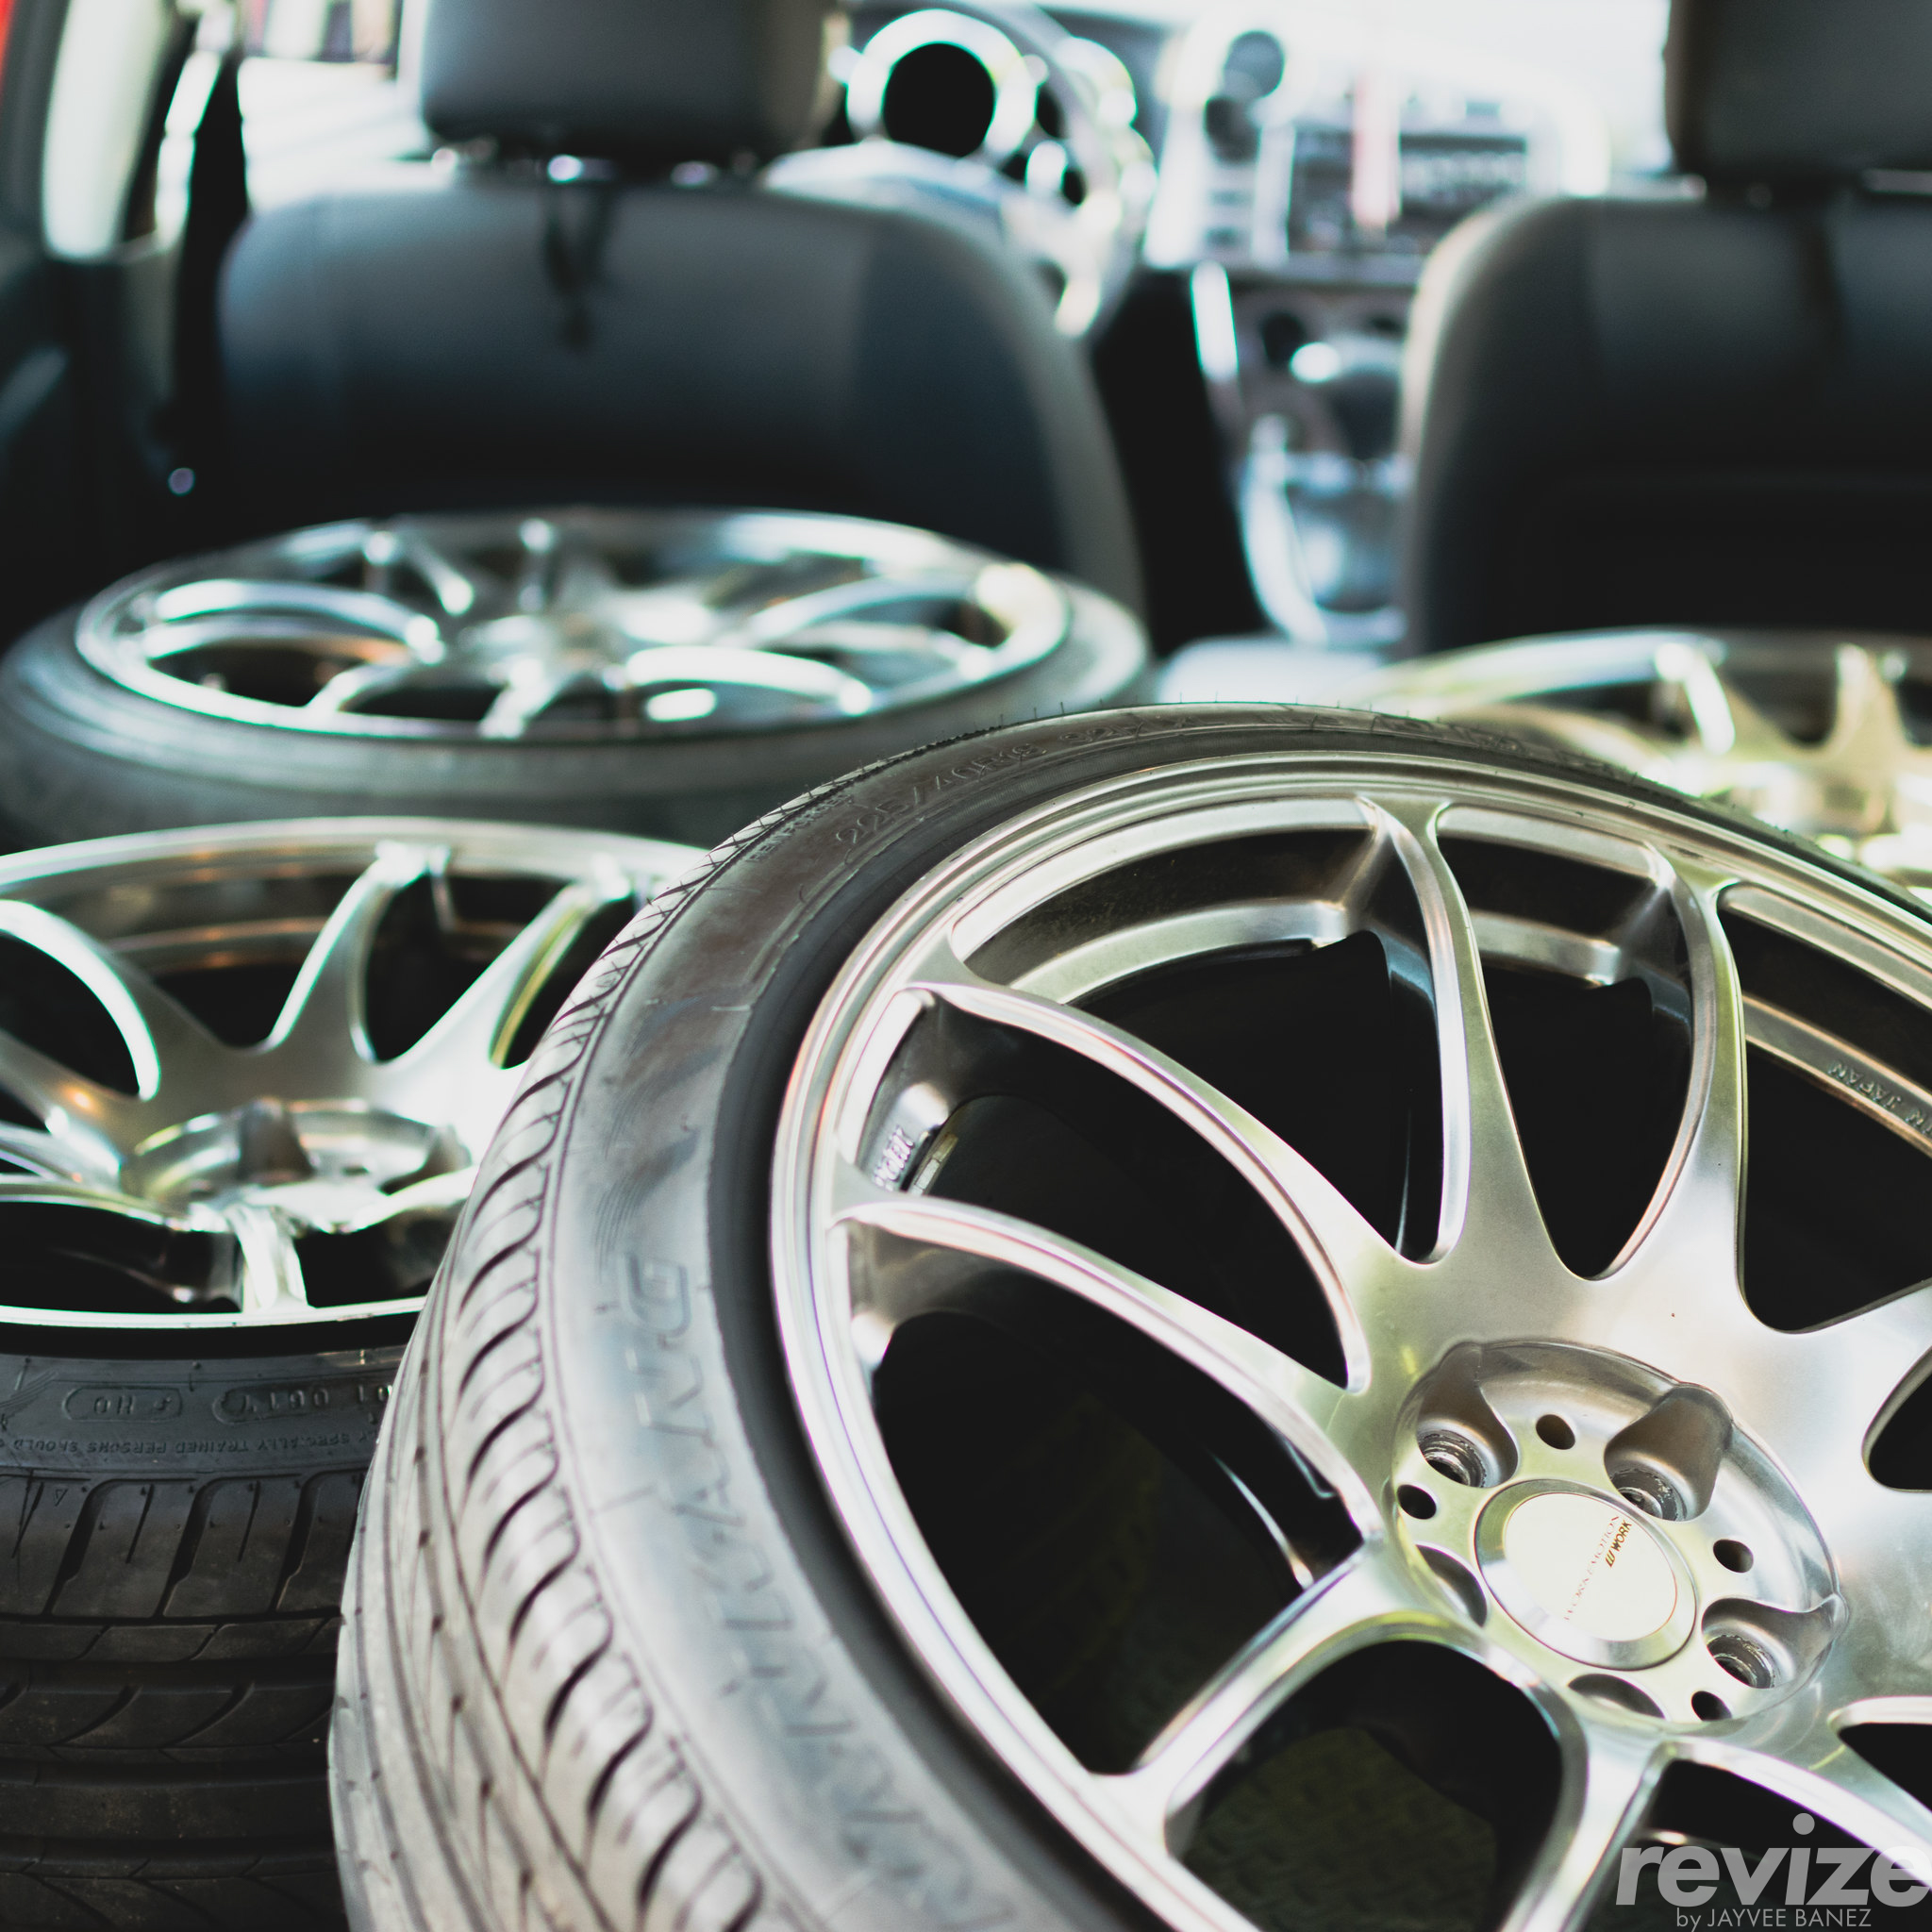
After adjusting to driving a lowered car, saving up enough money, and scouring Facebook Marketplace and Craigslist, I bought by first set of wheels. The Vibe had a wheel pattern (or PCD) of 5×100. The downfall of 5×100 wheels is that there’s a limited selection of cool wheels to choose from. Luckily, the Bay Area has a variety of owners and cars that can supply cool 5×100 wheels. I happened to purchase this set from a Toyota Prius owner. These are the Work Emotion Cr Kiwami Ultimates in GT Silver. It’s a staggered setup that runs 18×8.5 +38 and 18×9.5 +38.

Once installed on the car, it gave the car a more sporty vibe – no pun intended! For tires I ran Toyo Extensa HP IIs in 235/40R18. They fit nice on the 8.5-inch wide wheels and a mild stretch on the 9.5-inch wide wheels. One thing I did take for granted on this car was the paint. With it being my mom’s daily driver, she did not care much for the paint. When I took over the ownership, I tried my best to maintain it. Because the car sat outside and had 14 year old paint at the time, some of the clear coat started to peel on the hatch and hood (which luckily you can’t see here haha).

The GT Silver complimented the Vibe’s Lava Red paint. I also love how concave the spokes are on the rear wheels.
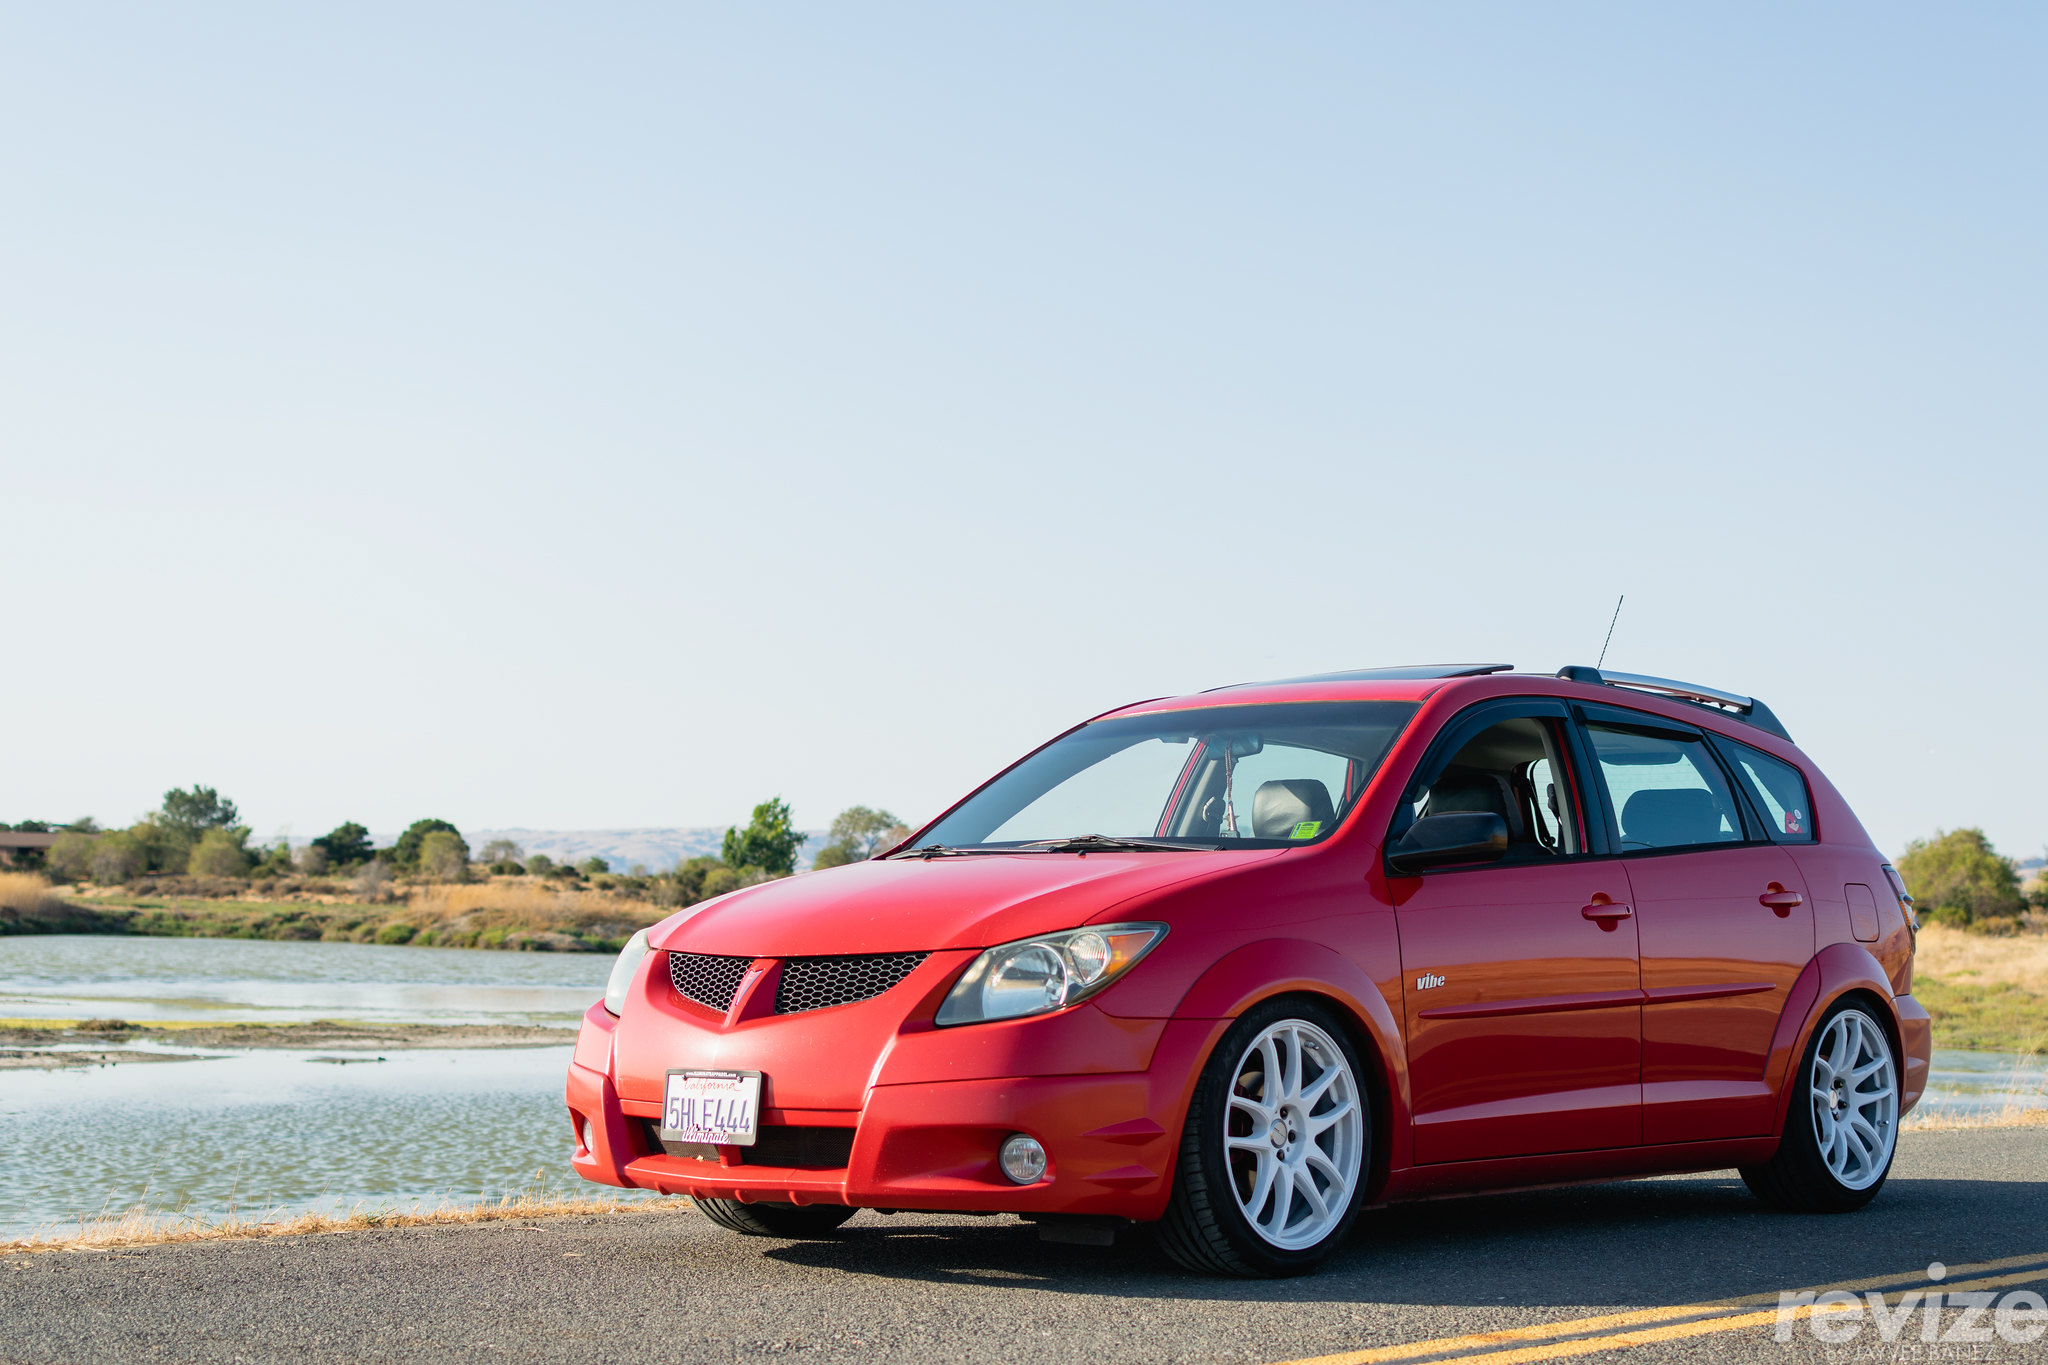
One of the biggest regrets on owning this set of wheels was applying white Plastidip to the wheels. I was going through an experimental phase with a limited budget. Plastidipping my wheels white seemed like the most cost-effective choice. It was fun prepping and painting the wheels but the texture was really bad. To make matters worse, cleaning them was a big issue because of the texture. If you’ve visited old homes with those ugly “popcorn” ceilings, you would be able to see that same texture on the wheels. It was not the best decision but like I said, I was experimenting.
The reason I wanted to changed the color is to pull off a red car and white wheel combination. I got inspiration from the Honda community. It gives off a street-build that makes you look cool when you’re cruising around or going fast – not that this car is merely fast in the first place. Pulling more inspiration from Honda builders was achieving optimal ride height. I managed to lower the car another inch and it made the car look even cooler. At this point, I wanted to build the car as if I owned a Honda Civic.

Stage 2: Improving wheel fitment
This experimental phase reached a point where I started to really push the capabilities of this chassis. I got ride height down and wheel fitment was decent. The modifications I’ve done so far are relatively simple and can be easily replicated by those who wants a simple drop on wheels with their Vibe’s.
It couldn’t stop there for me. I wanted to keep raising the bar for the chassis and finding the best fitment I could. This next stage is where things really start to get interesting. My mindset switched in that I wanted to provide answers/solutions for the questions I couldn’t find the answers or solutions to.
- How can I achieve better fitment? Offset?
- How do I roll the fenders?
The first objective was to improve wheel fitment. I was able to achieve that by installing wheel spacers. I used studded, hubcentric wheel spacers. They were spacers that have studs installed onto them so you’re able to fasten the spacer to the wheel hub and fasten the wheel to the spacer. Unfortunately, I ran into issues with the front axle as I had to shorten the length of the wheel studs to get the wheel to seat properly with the addition of the wheel spacer.
The second objective was to reduce rubbing after installing the spacers. The Vibe features a plastic overfender on top of the metal front fender and rear quarter panel. The front fender requires trimming some of the overfender to reveal the metal fender underneath. From there, I bought a cheap fender roller on eBay that my pops had to give a stubby treatment because the roller was just too long for this application. I was able to roll the front fenders along with some persuasion of a metal hammer. The rear fender is similar to the front fenders in trimming away the plastic fender and manipulating the metal fender. The only problem is that when this chassis is lowered, the rear wheels gets pulled closer to the front of the vehicle or the rear passenger doors.
As you can see in the photo above, I didn’t account for the wheels getting closer and I carved a huge chunk of tire from the sidewall. I remember putting a lot of work into getting the fenders right. I threw the wheels on with the newly-added spacers and decided to treat myself with a Double-Double meal from In N Out. The car drove fine and didn’t run into any rubbing issues. It wasn’t until I went down the In N Out sloped, driveway where the rear suspension got “loaded” and the rear tires got chewed up by the rear fender. I was about halfway home and started to hear something slapping against my car in a repetitive manner. “Pluck pluck pluck pluck” was all I heard until I parked in my driveway. That’s when I realized I had an issue.
In the dark evening, I got out the car and walked to the source of the “pluck pluck pluck” sound”. I stood there with my In N Out to-go bag saturated with grease at the bottom in one hand, dripping wet regular-sized Dr. Pepper in the other, and I saw the carnage that has occurred. I set my Dr. Pepper on the roof and pulled out my phone to use the flashlight function to make out what happened. A rubber flap of tire material made its mark onto my driver rear fender. It was like I went to the track and had gone drifting… I realized I haven’t cut off enough material but it was too dark and I’ve put in enough work that day. It would be a tomorrow problem.
The next day, I raised the car and trimmed off more material to allow for the tires to clear. TIP: When you’re experimenting with fitment, one way you can simulate “load” to your vehicle’s suspension as if it’s on the ground is by mounting your wheels using 3 out of 5 lug nuts (or 2 out of 4 if your car is equipped with 4-lug pattern) and placing the saddle of your car jack underneath the wheel, control arm, spindle, or torsion beam. Disclaimer: I am not responsible for damage to your vehicle. Please be extra careful when lifting vehicles.
As a result of adding spacers and making modifications to the fenders, the vehicle sits more proper. The wheels sit closer to the fender and fills up the gaps. Adjusting the fitment makes it look as if a slim guy originally wearing a loose, oversized shirt gained some weight, hit the gym, and filled in the empty space of his shirt with some bulk.
Adding the spacers results in effective offset. Effective offset is essentially a measurement made when you alter the distance between the wheel and the wheel hub using wheel spacers. For example, on the front I added 15mm spacers to use on a wheel with +38 offset. I’ve increased the distance between the wheel and the wheel hub which 1) pushes the wheel away from the hub and 2) pulls the wheel closer to the fender. With the spacers, the effective offset is +23 (+38mm – 15mm = +23mm). For the rears, there was a huge gap to fill so I decided to go with 25mm spacers. The wheel specs and effective offset would now be:
- Front: 18×8.5 +38 (effective offset: +23; 15mm spacer)
- Rear: 18×9.5 +38 (effective offset: +13; 25mm spacer)
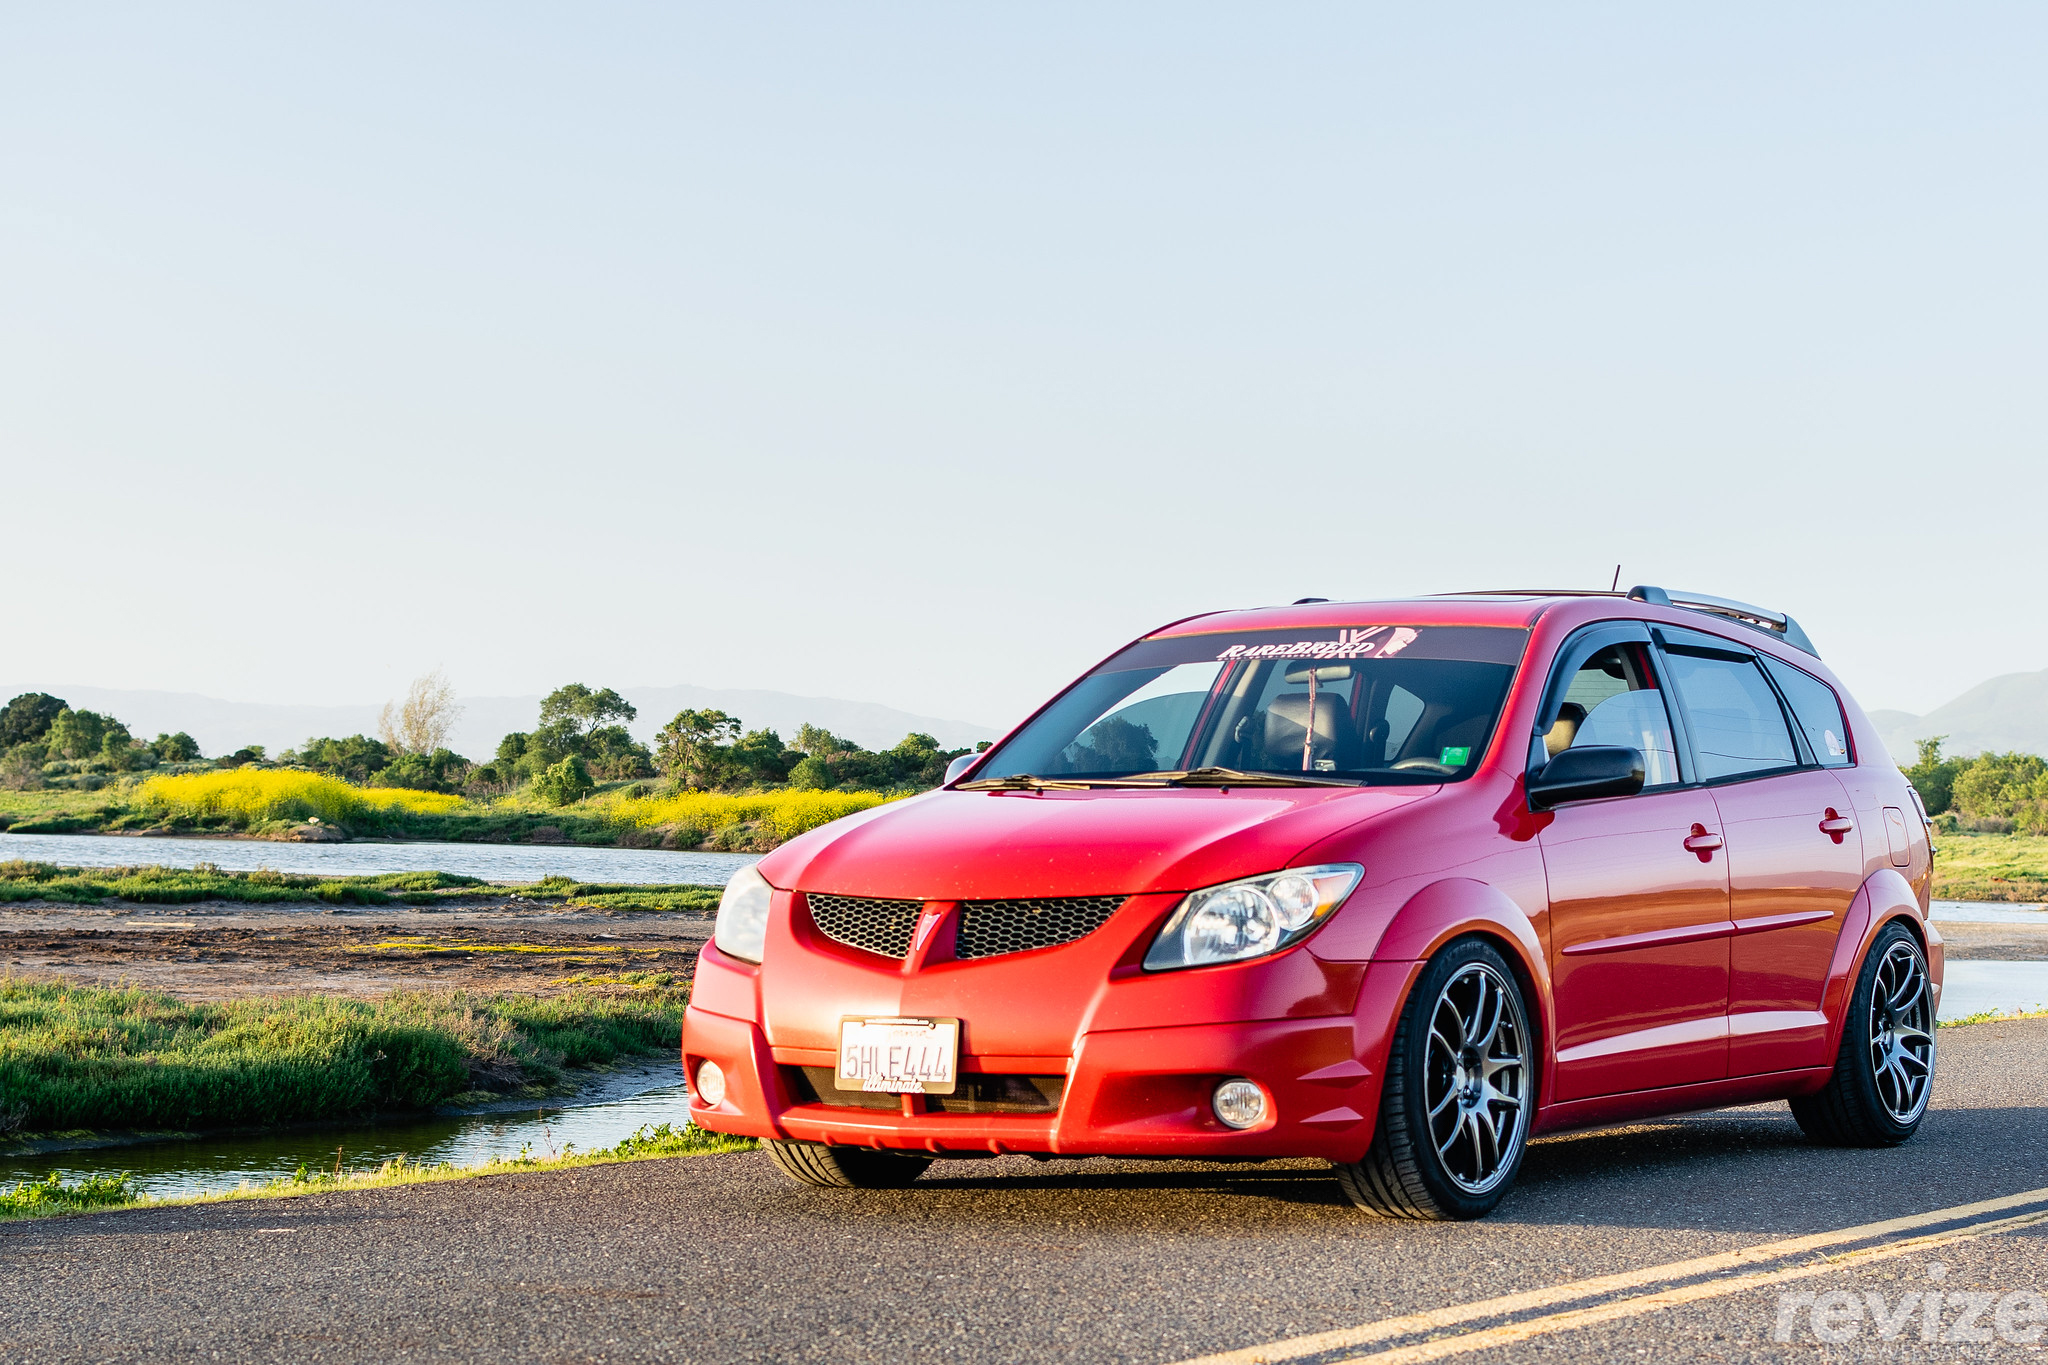
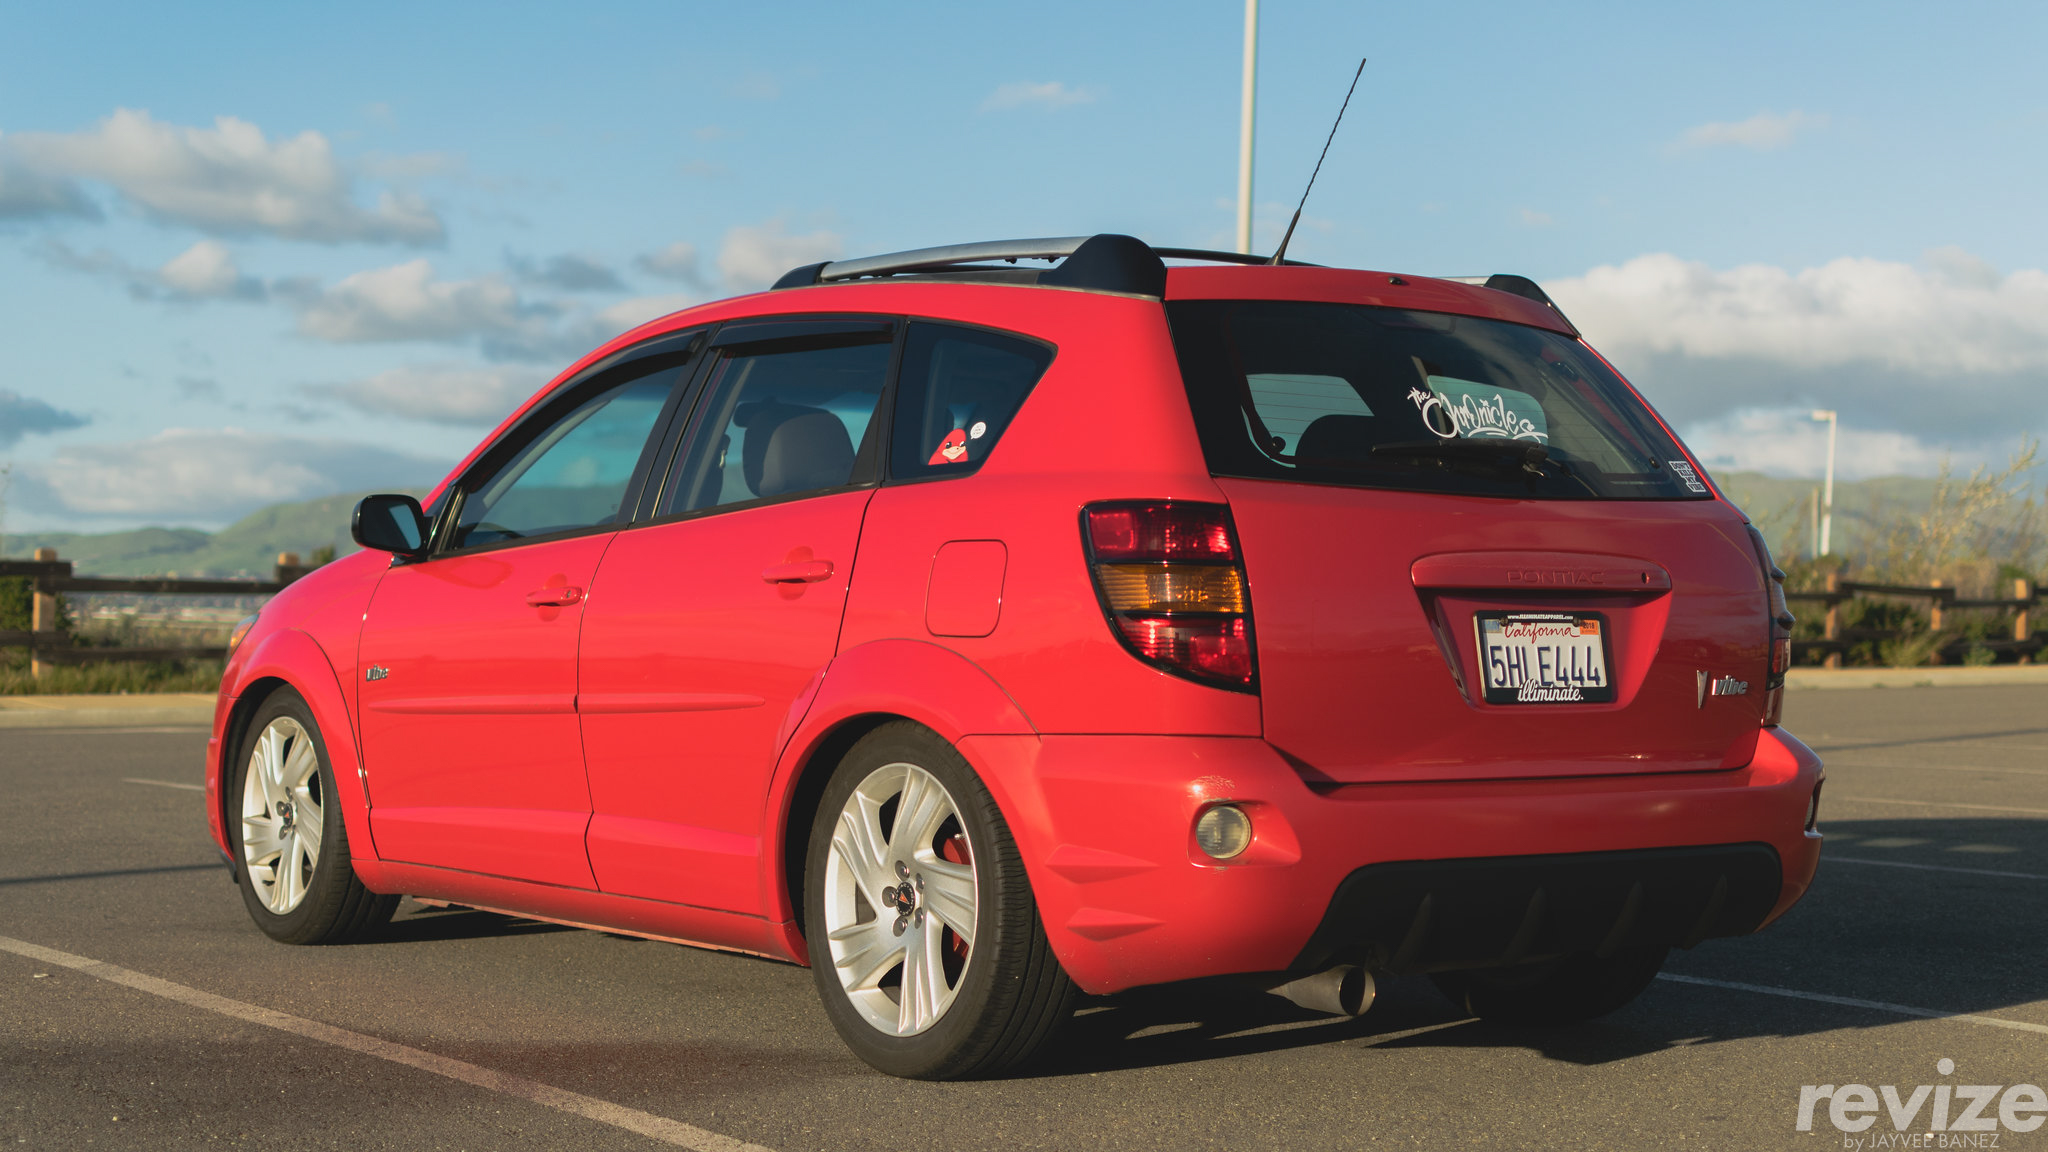
The Vibe was looking better each time I squabbled with the lock rings or collars of the BC Racing coilovers to lower the car an 1/8 inch to 3/4 inch. It started to feel like my car and feel personal. If you noticed, I situated a RareBreed “Zero Two” windshield banner and a Zero Two “peeker” sticker on the driver side 3rd window. My anime fascination was at its peak during my early-college years and I was watching Darling in the Franxx. My anime waifu was this pink-haired humanoid monster named Zero Two and I chose to display her on my car. The windshield banner was a nice installment because it was functional. I rarely used the sun deflectors to block out the sun rays because of the windshield banner. I also saved enough money to get rid of the fish bowl look by getting the windows tinted over at Canlas Window Tint (Website).

Lastly, I decided to ditch the atrocious RC-car antenna. I despised that antenna because it ruined the flow of car when you view it at various angles. In replacement, I used a OEM Honda S2000 antenna; part number is 39151-SWA-305. It improved the flow of the car significantly. If it hasn’t been clear yet, it’s the small details that can improve the flow of the car…
Stage 3: Refinement
The biggest visual change was this OEM rear bumper extension from GM. It’s a rare part and highly sought after in the Vibe community. Ever since I first discovered it, I scoured the internet to see if I can even find one. Luckily, there was one for sale on eBay and the listing price was $500, if I remember correctly. I didn’t pull the trigger right away though. I had it bookmarked on my web browser for a while and it was always in the back of my mind. “Should I just buy it?”, “Am I really about to spend $500 on this kit?”, and “Would it really be worth it?”. Long story short, it was absolutely worth it.
When the kit arrived, it was painted with only primer. The kit wasn’t fiberglass. It was like a polycarbonate material that had some flexibility when it’s not mounted to the car. The benefit of owning an OEM kit is superb fitment. I did a mock set-up of the bumper onto the car and it fit snugly. To secure the kit onto the vehicle, it required 3M double-sided tape and 4 screws.
With the car being built on a budget, I chose to paint the bumper myself. I ordered color-matched paint from Automotive Touchup (Website) and went to town. There were 4 stages to painting the bumper: 1) applying Rustoleum primer, 2) sanding the primer, 3) applying the Automotive Touchup base coat (color layer) , and 4) applying the Spray Max 2K Clear Coat.
This was the most complete stage where I had the car. It was my favorite stage in the build too. Optimal ride height and wheel & tire fitment was achieved. The side profile of this thing just looked cool. Ironically, this stage was my favorite but it didn’t last long as I had inquired for a new set of wheels. Not just a random set of new wheels but a set of dream wheels.

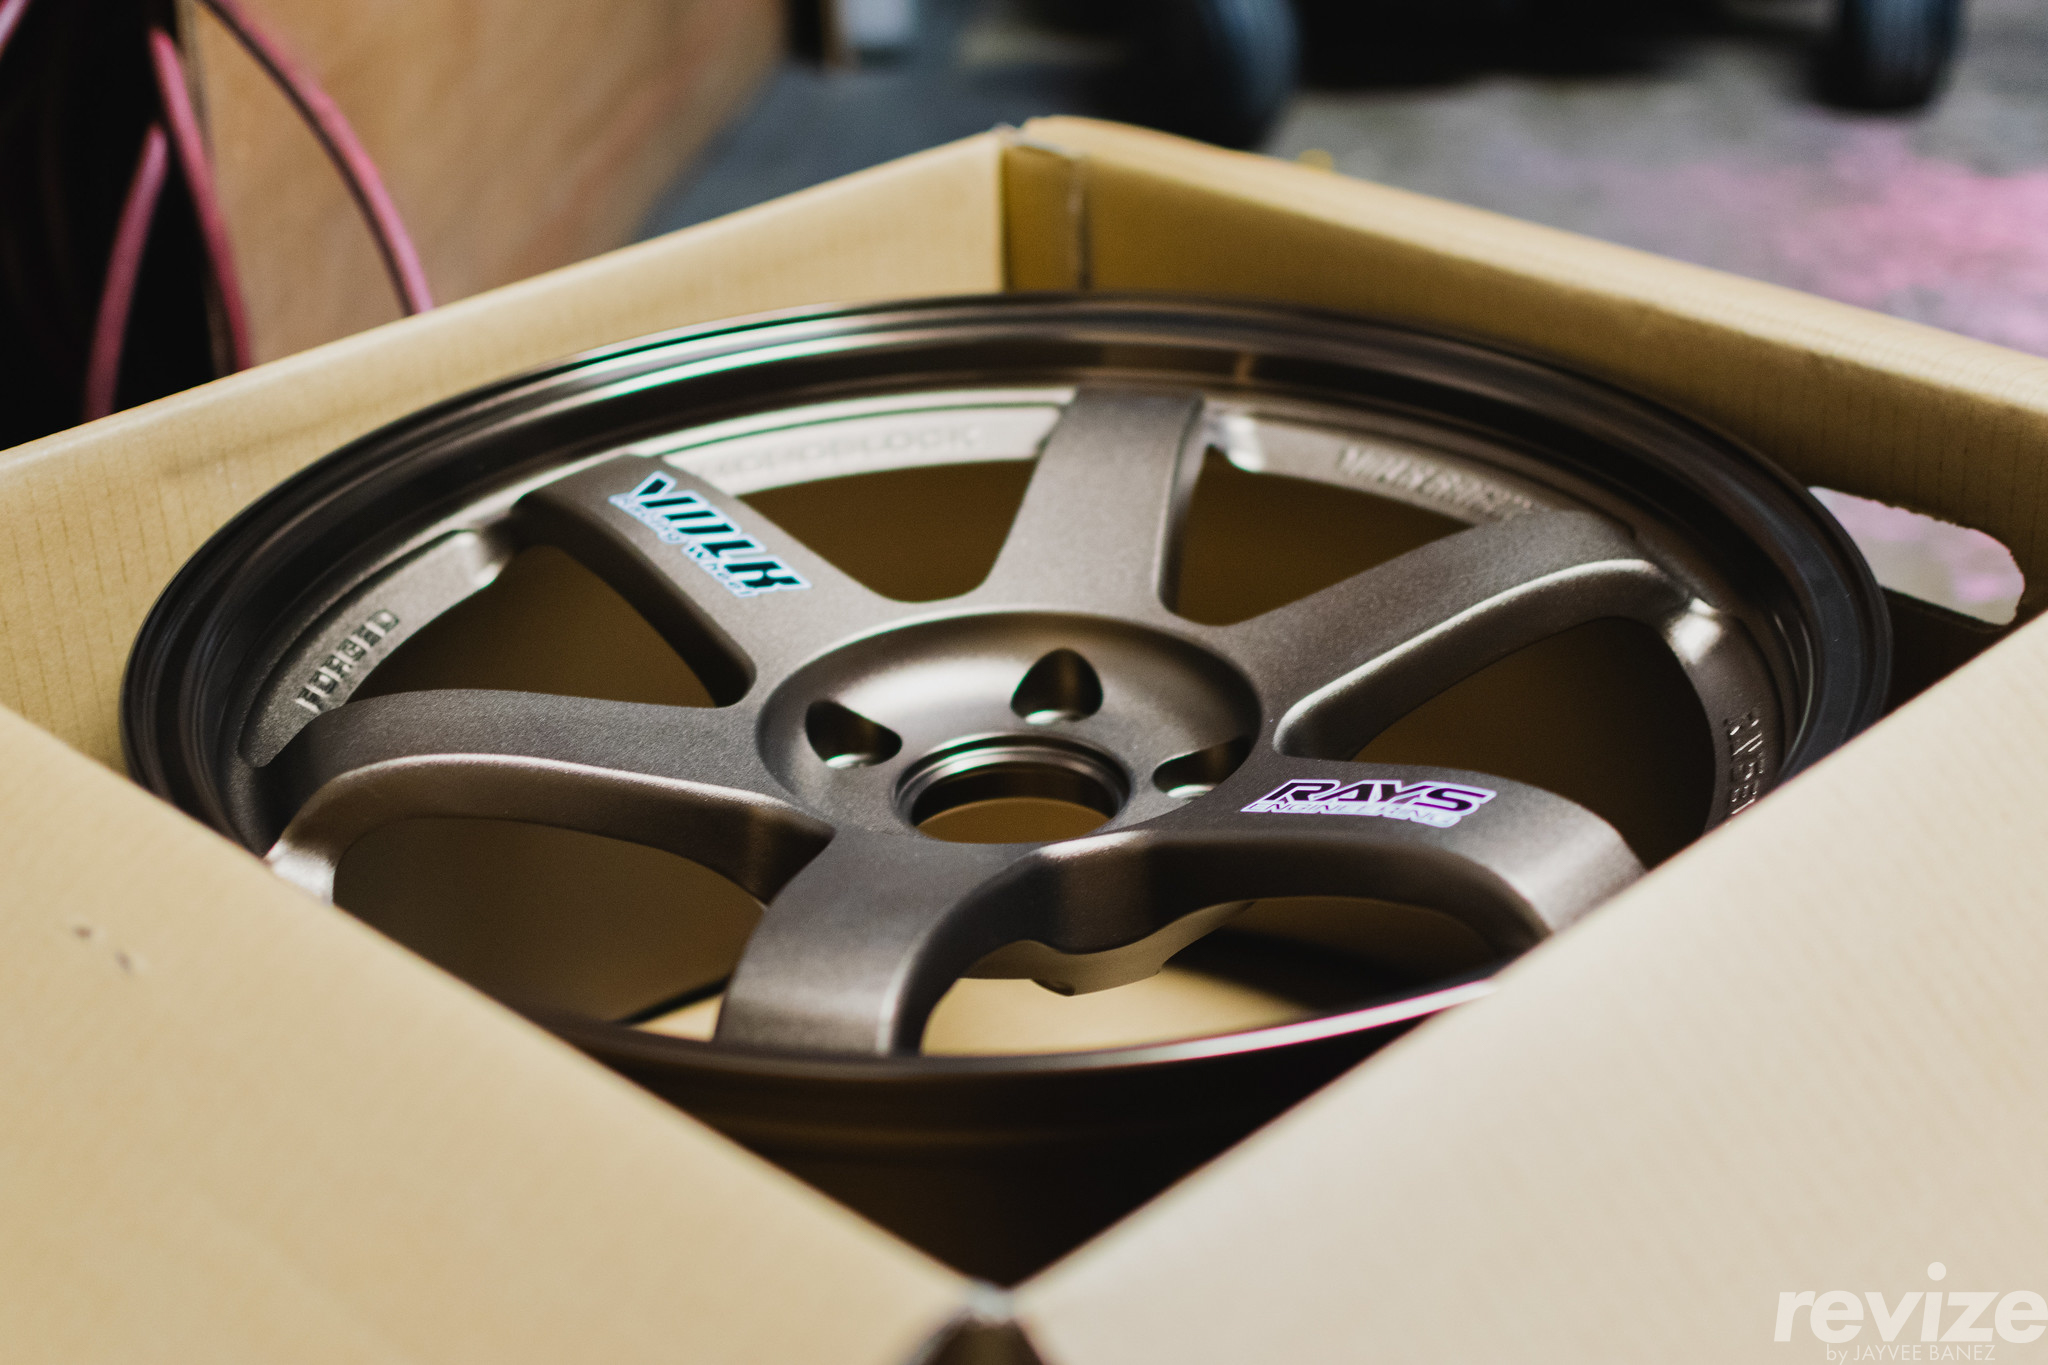
Yup, these boxes hold one of the most iconic wheels: Rays Engineering Volk TE37 OGs… Interestingly, I ordered the wrong bolt pattern on purpose. The Vibe’s bolt pattern is 5×100 but these wheels came in 5×114.3. This would allow me to fit them onto a broader range of cars if I ever switched chassis. Besides that, I was able to order conversion spacers that allows cars like mine to adapt wheels with a 5×114.3 lug pattern.
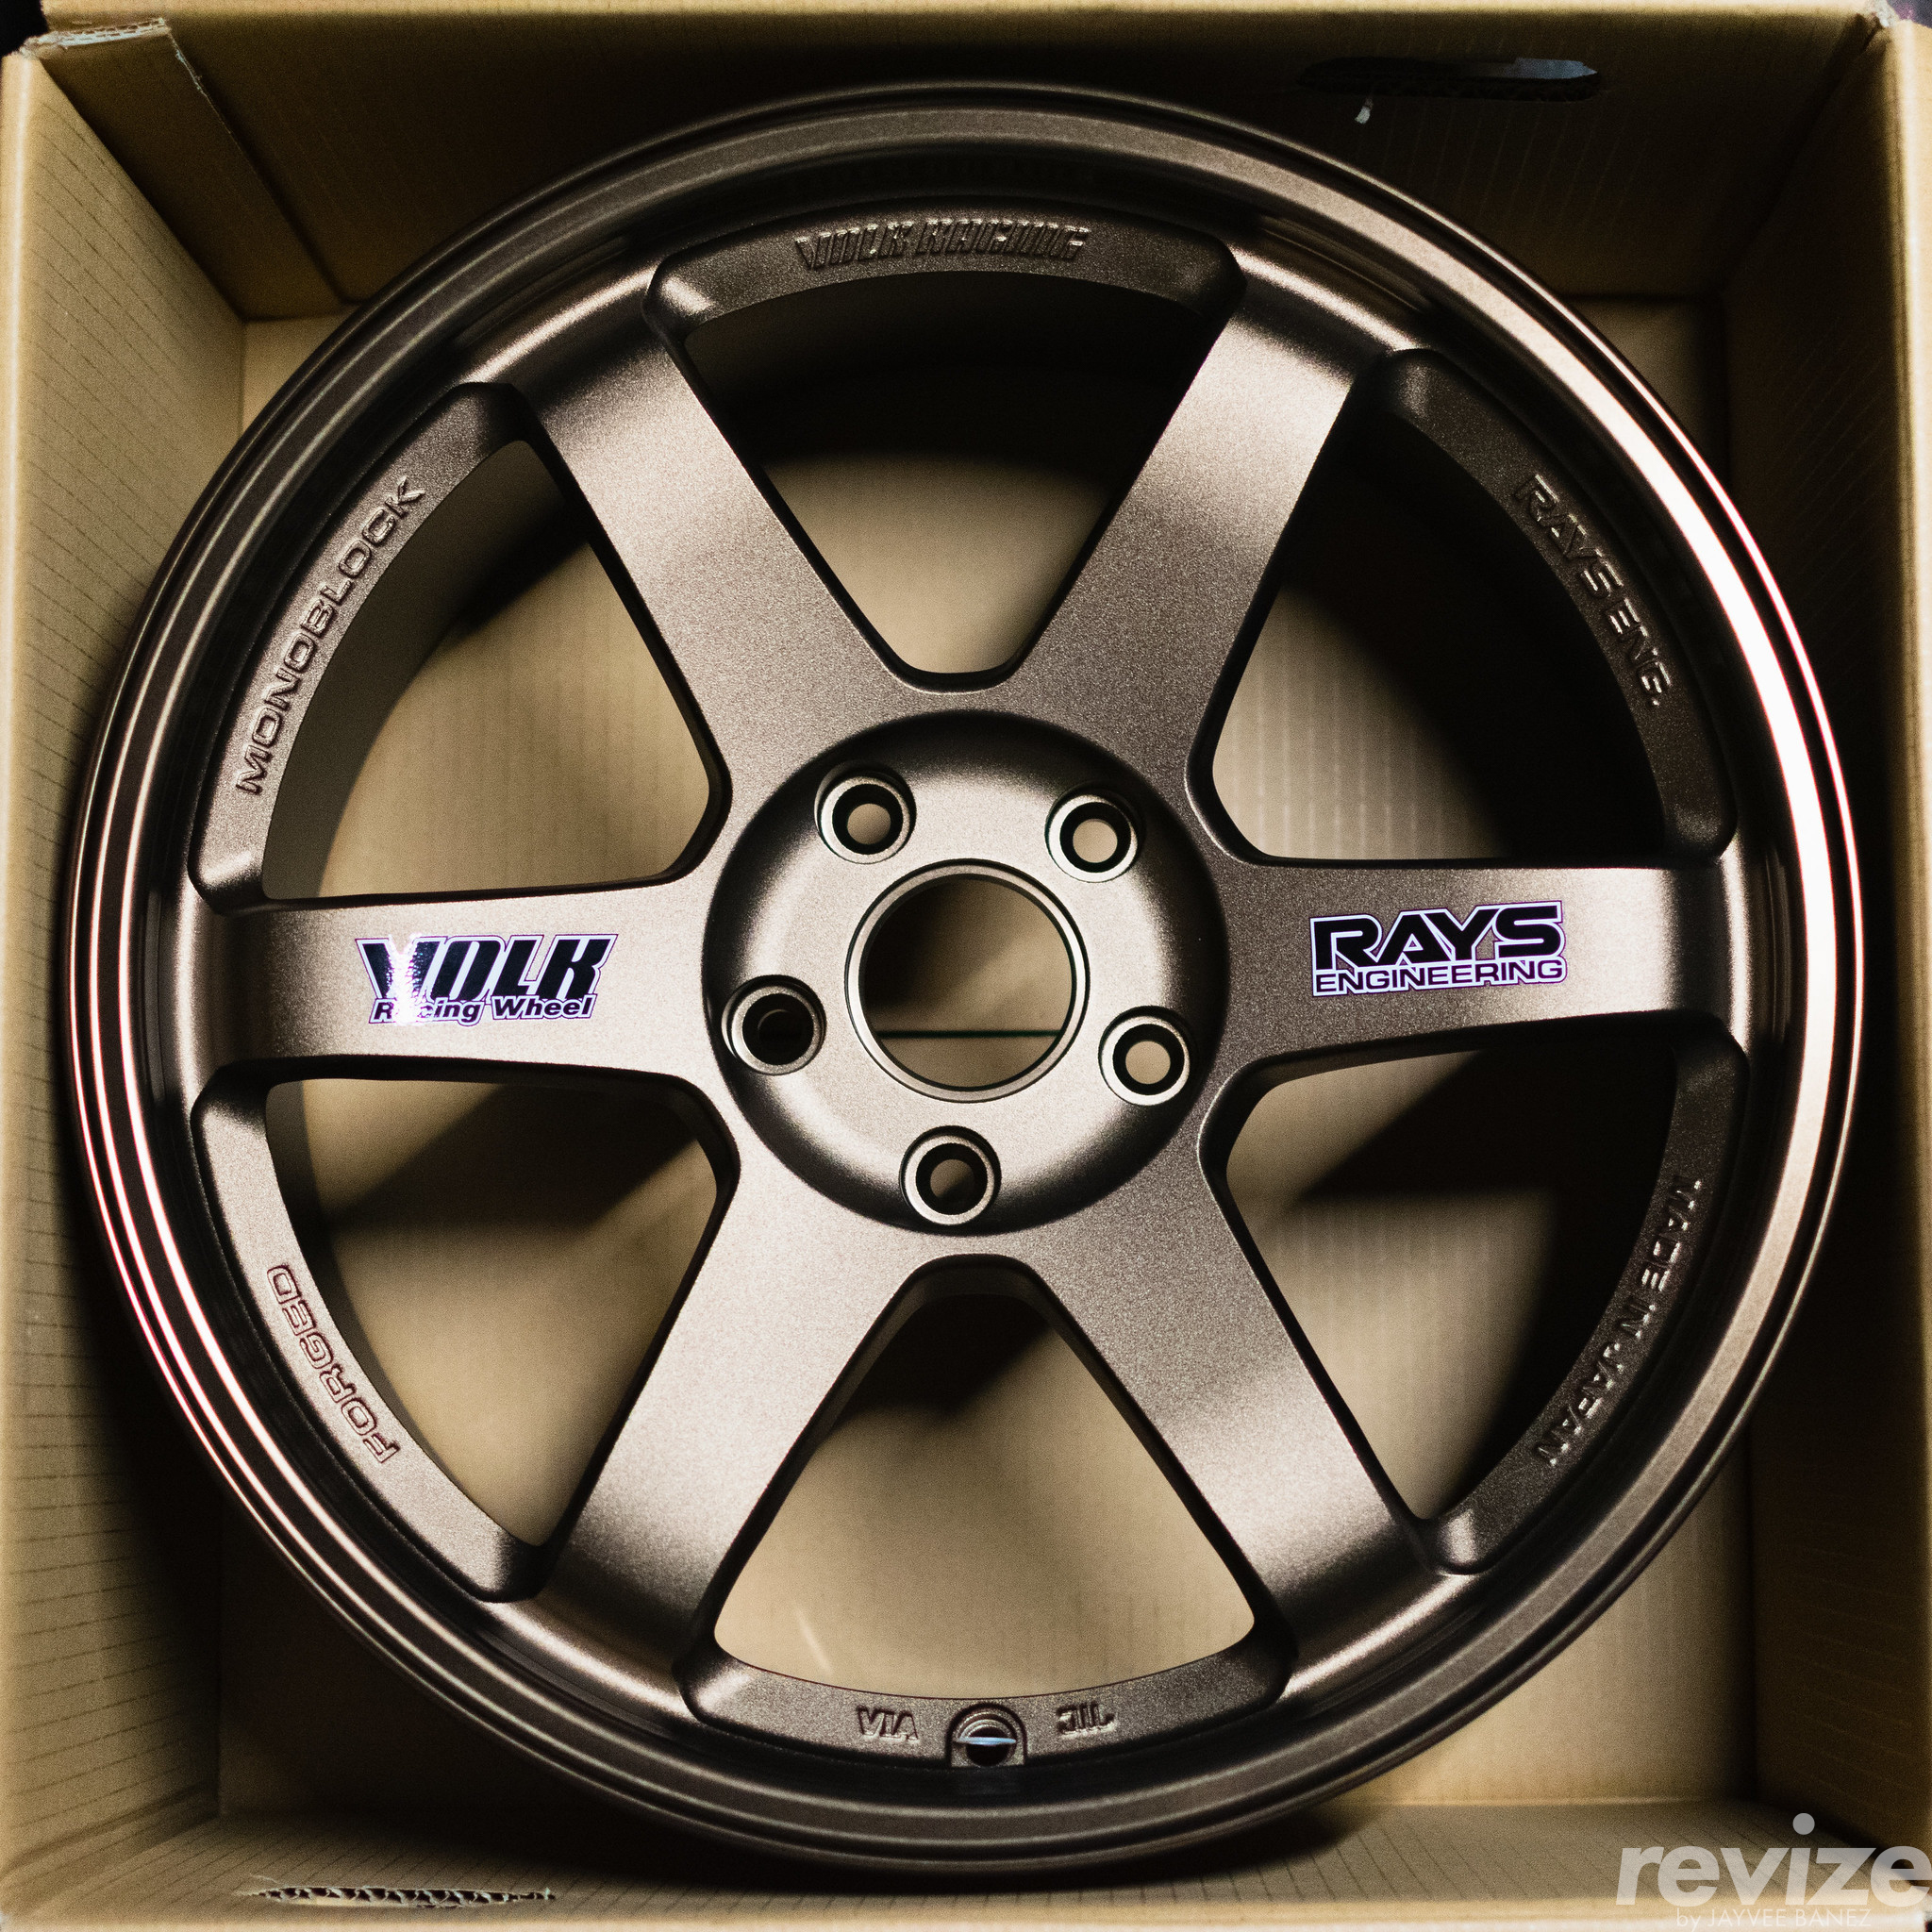
As you can see, I ordered a set in a Bronze colorway. I was able to cop this set from System Motorsports (Website) with the help from Thomson Ho (Instagram). There are many reasons why I decided to purchase wheels that cost an equal amount to the car, if that even more… One reason I decided to buy a set is because it would be the last time I could get my hands on the TE37 OG product line. Rays would discontinue the TE37 OG variant and TE37 SL variant making them unavailable, brand new in the future. The second reason was to check off something from my bucket list which was: “Own a set of TE37s”. Third reason is a nod to Ryan Der’s (Instagram) funny hashtag #te37everything (Instagram). (I’m positive that he’s not the creator of this hashtag but I primarily associate this hashtag to him!) The Vibe is a reliable daily driver to the general public so I thought it would be a polarizing idea to have this car sit on a set of famous racing wheels. Again, I just wanted to do something cool with the chassis…
Side note: Around this time, I was also looking into buying my dream car. I wanted to buy wheels for the next chassis and these would look good on it. Little did I know that 17-inch wheels looked better on the 8th Gen Civic chassis than these 18-inch wheels…
Owning a brand new set of wheels is daunting. Actually, owning a brand new anything is daunting because you now have this anxiety of preserving the mint condition of a brand new item. Spoiler alert: I did end up curb rashing the wheels when I was pulling into a parking garage. It was the type of parking garage where there was a gate at the entrance and you push a button to retrieve a parking ticket. I wanted to get as close as possible without having the need to lift my butt off the seat, unbuckle my seatbelt, and open the door slightly to reach for the parking ticket. I’m sure someone would relate to that struggle… I got close to the robotic parking attendant. Too close… CCCCKKKKKK is the sound I heard as I scraped the curb that the parking gate was settled on. My heart sunk immediately as well as the humility settling in as I made a stupid mistake. To live and learn, I guess!
Now let’s take a look at how the wheels fit on the car!
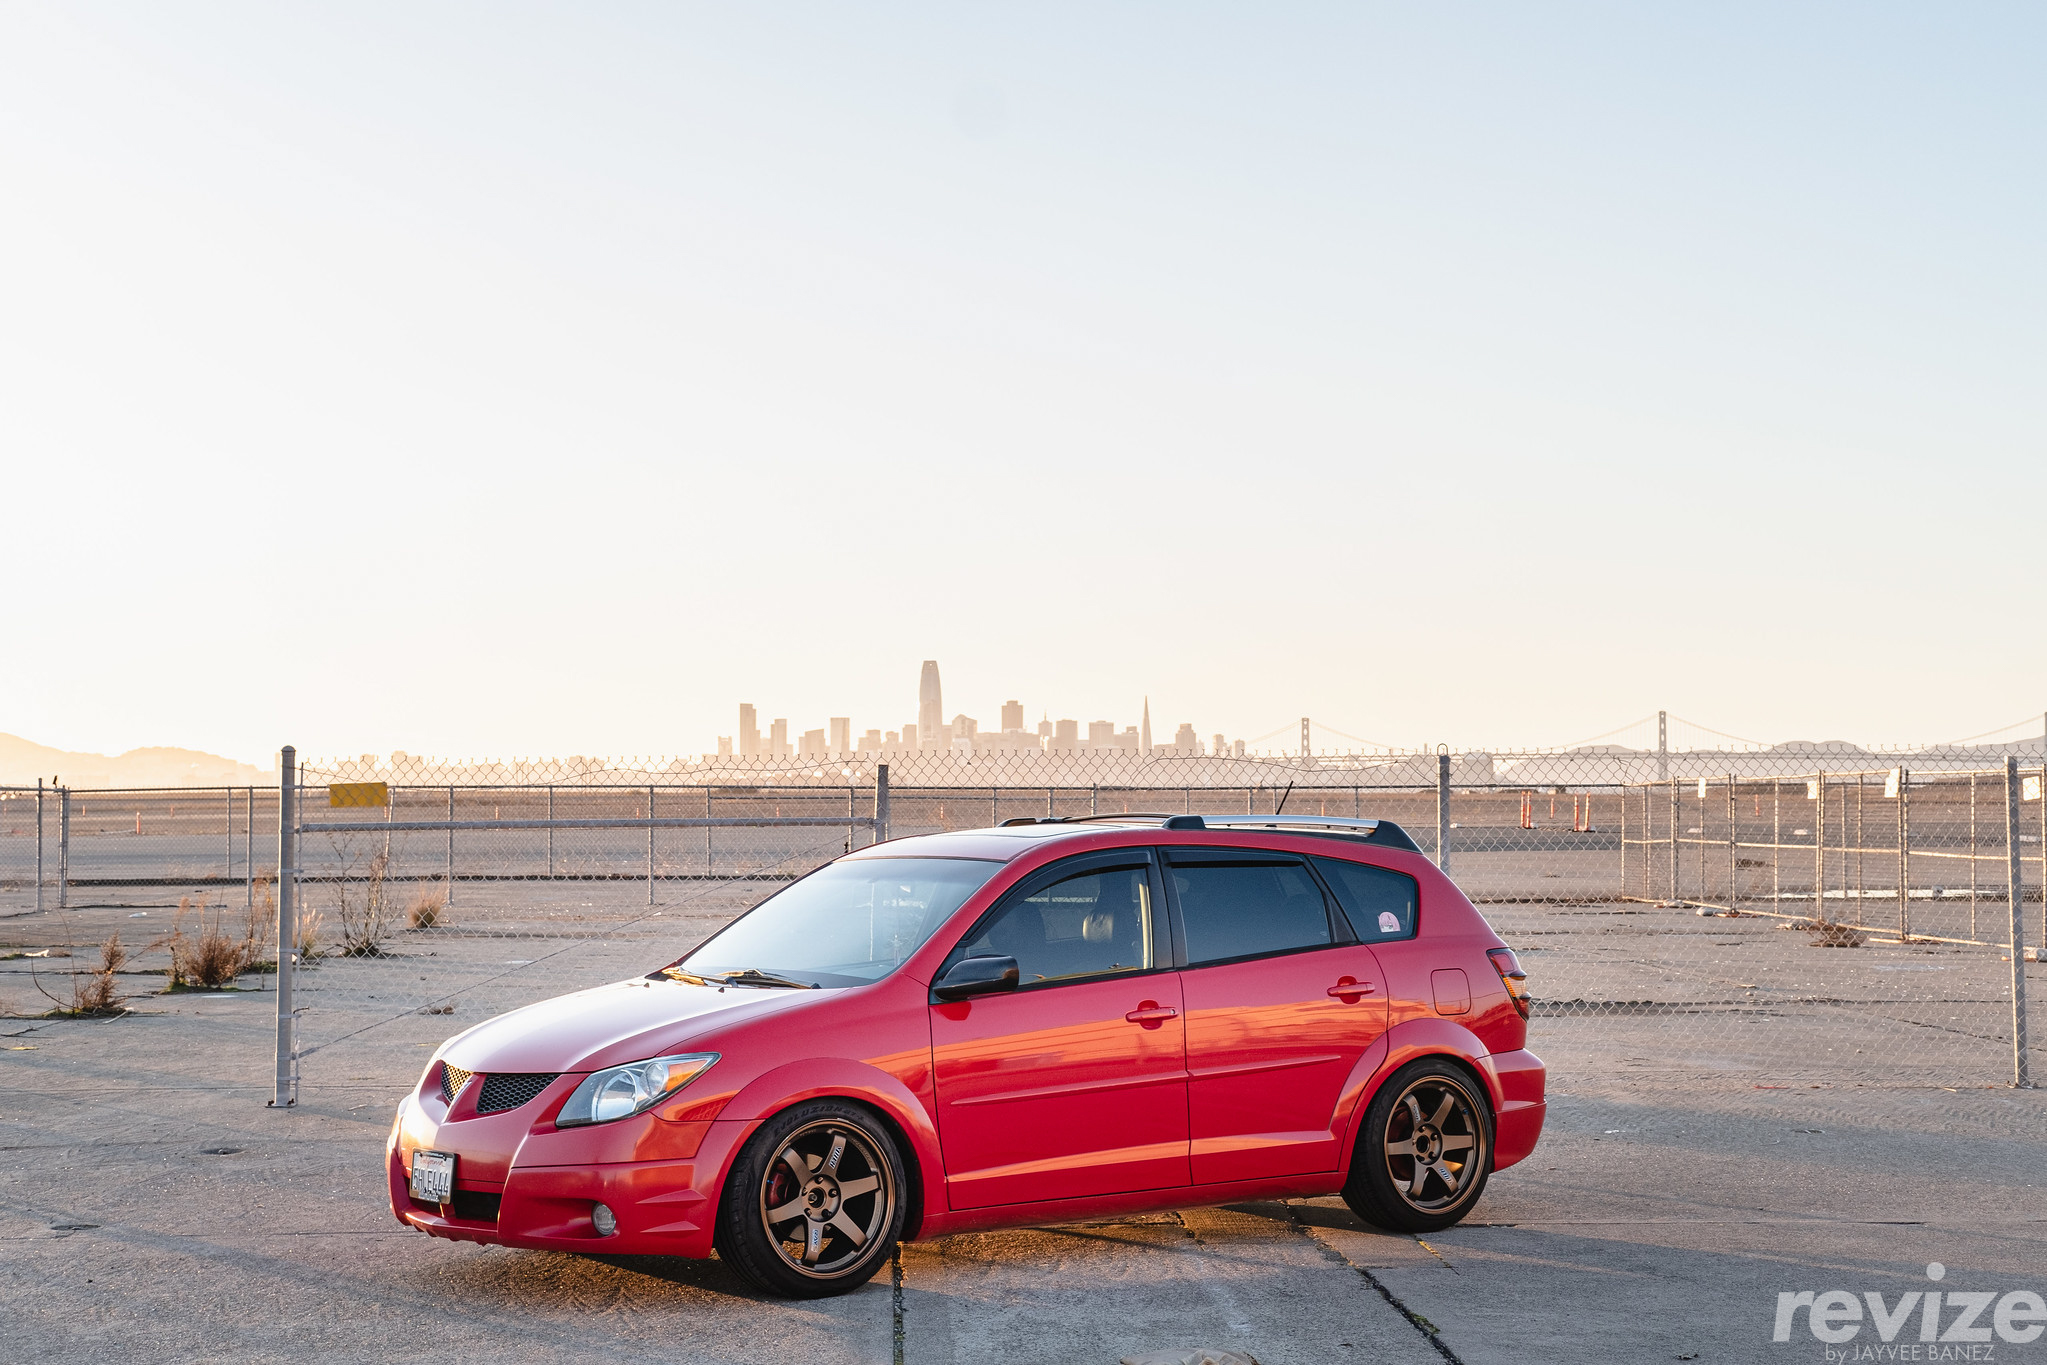
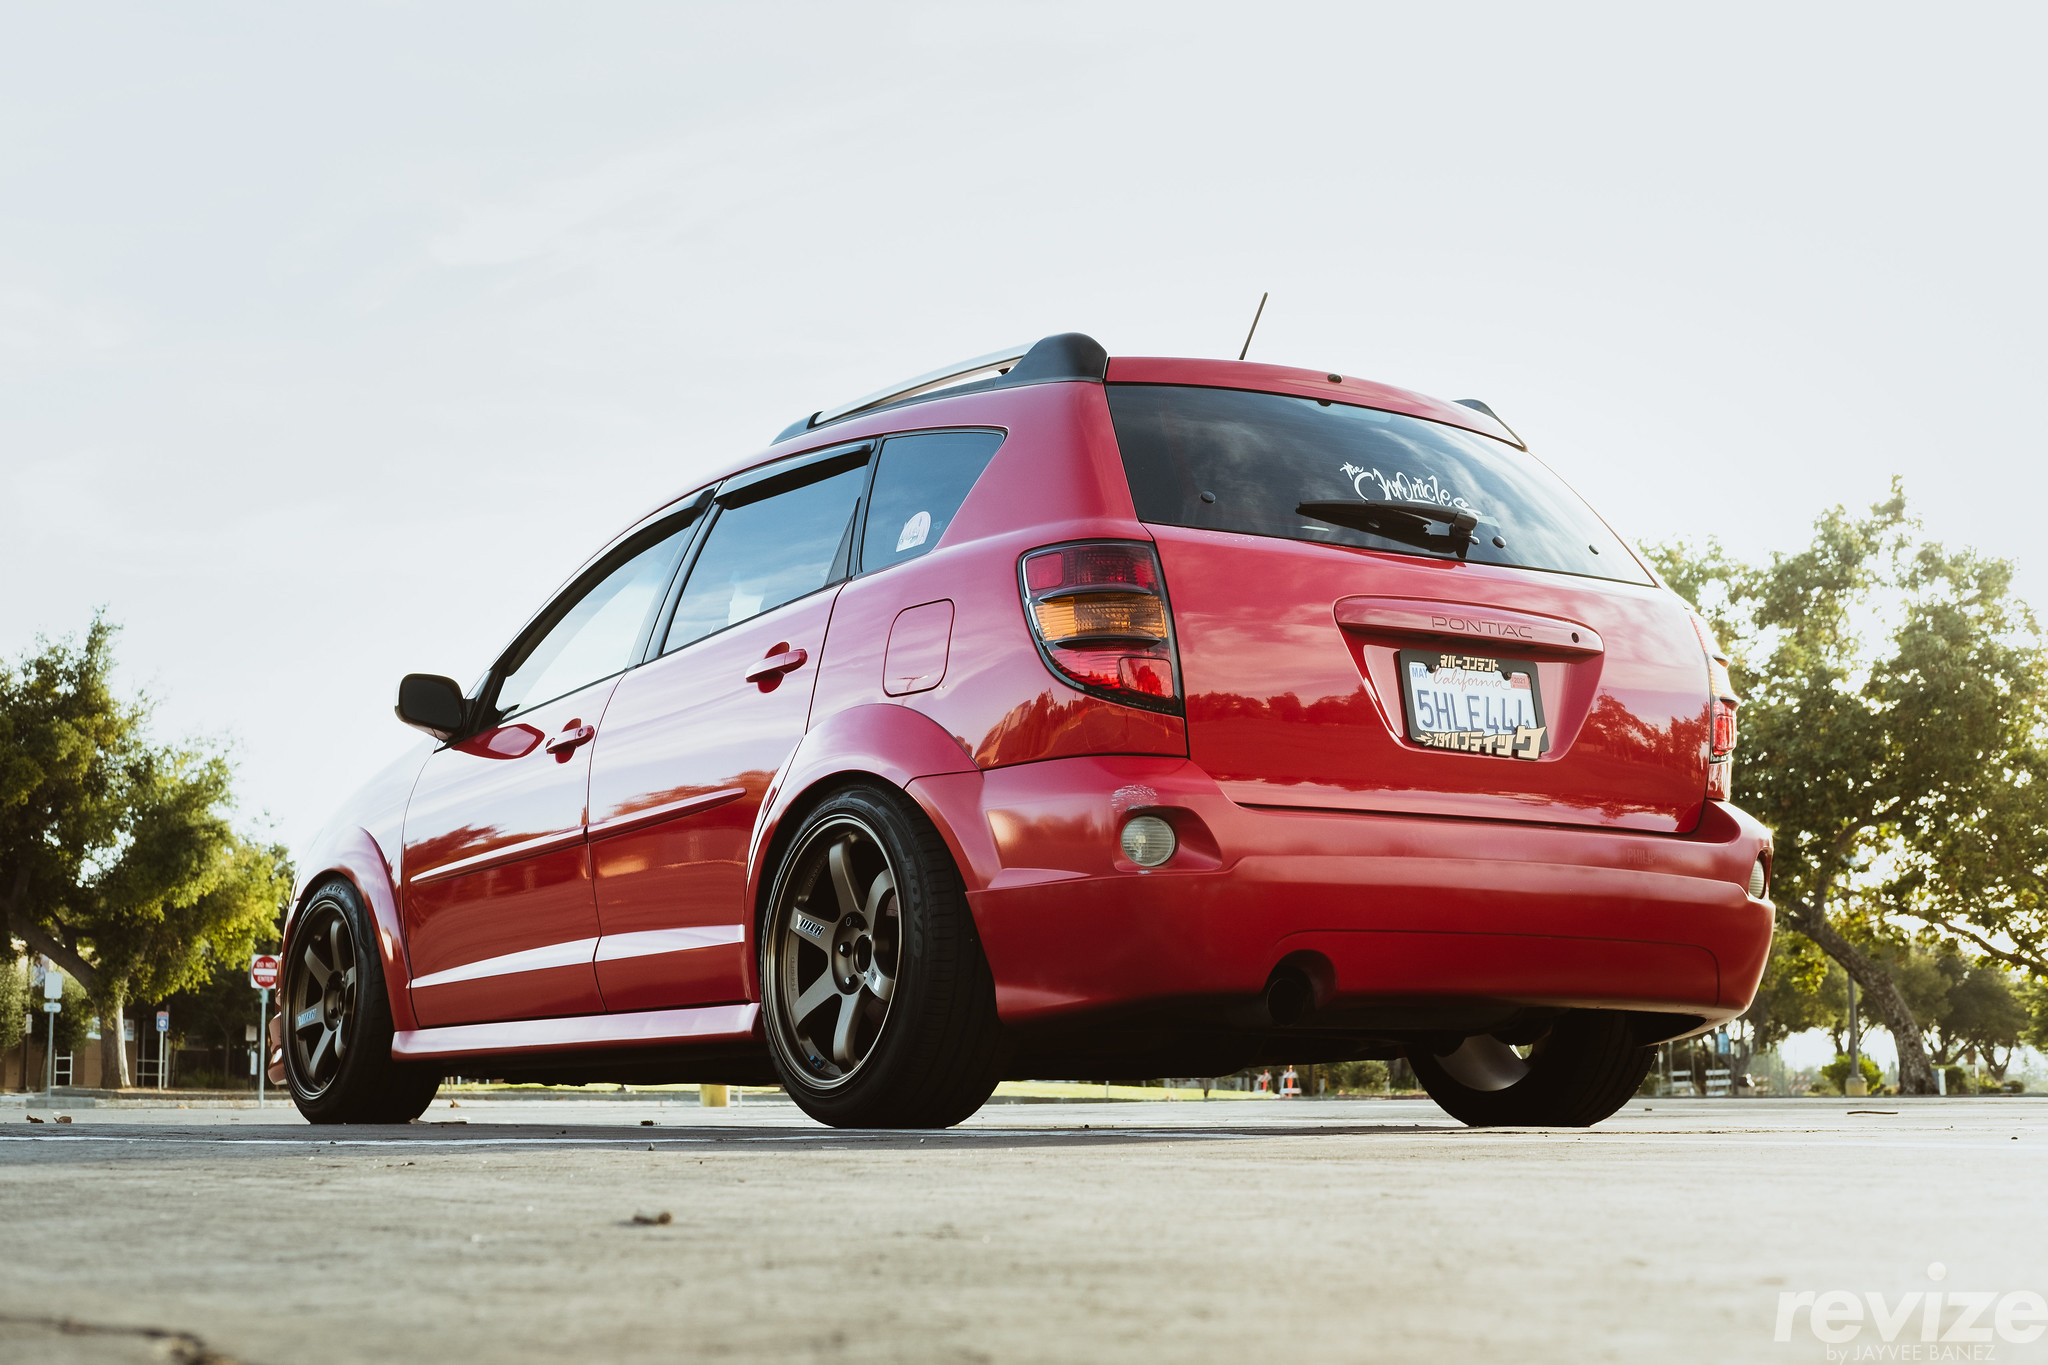
This is the Vibe in it’s close-to-final stages… I loved how the bronze contrasted against the Lava Red paint. The wheel specs are 90% the same besides the front wheel being 1-inch wider than the Work CR Kiwami I had on prior.
Specifications:
- Wheels: Rays Engineering Volk TE37 OG, 5×114.3
- Front: 18×9.5 +38 (effective offset: +23, 15mm spacer)
- Rear: 18×9.5 +38 (effective offset: +13, 25mm spacer)
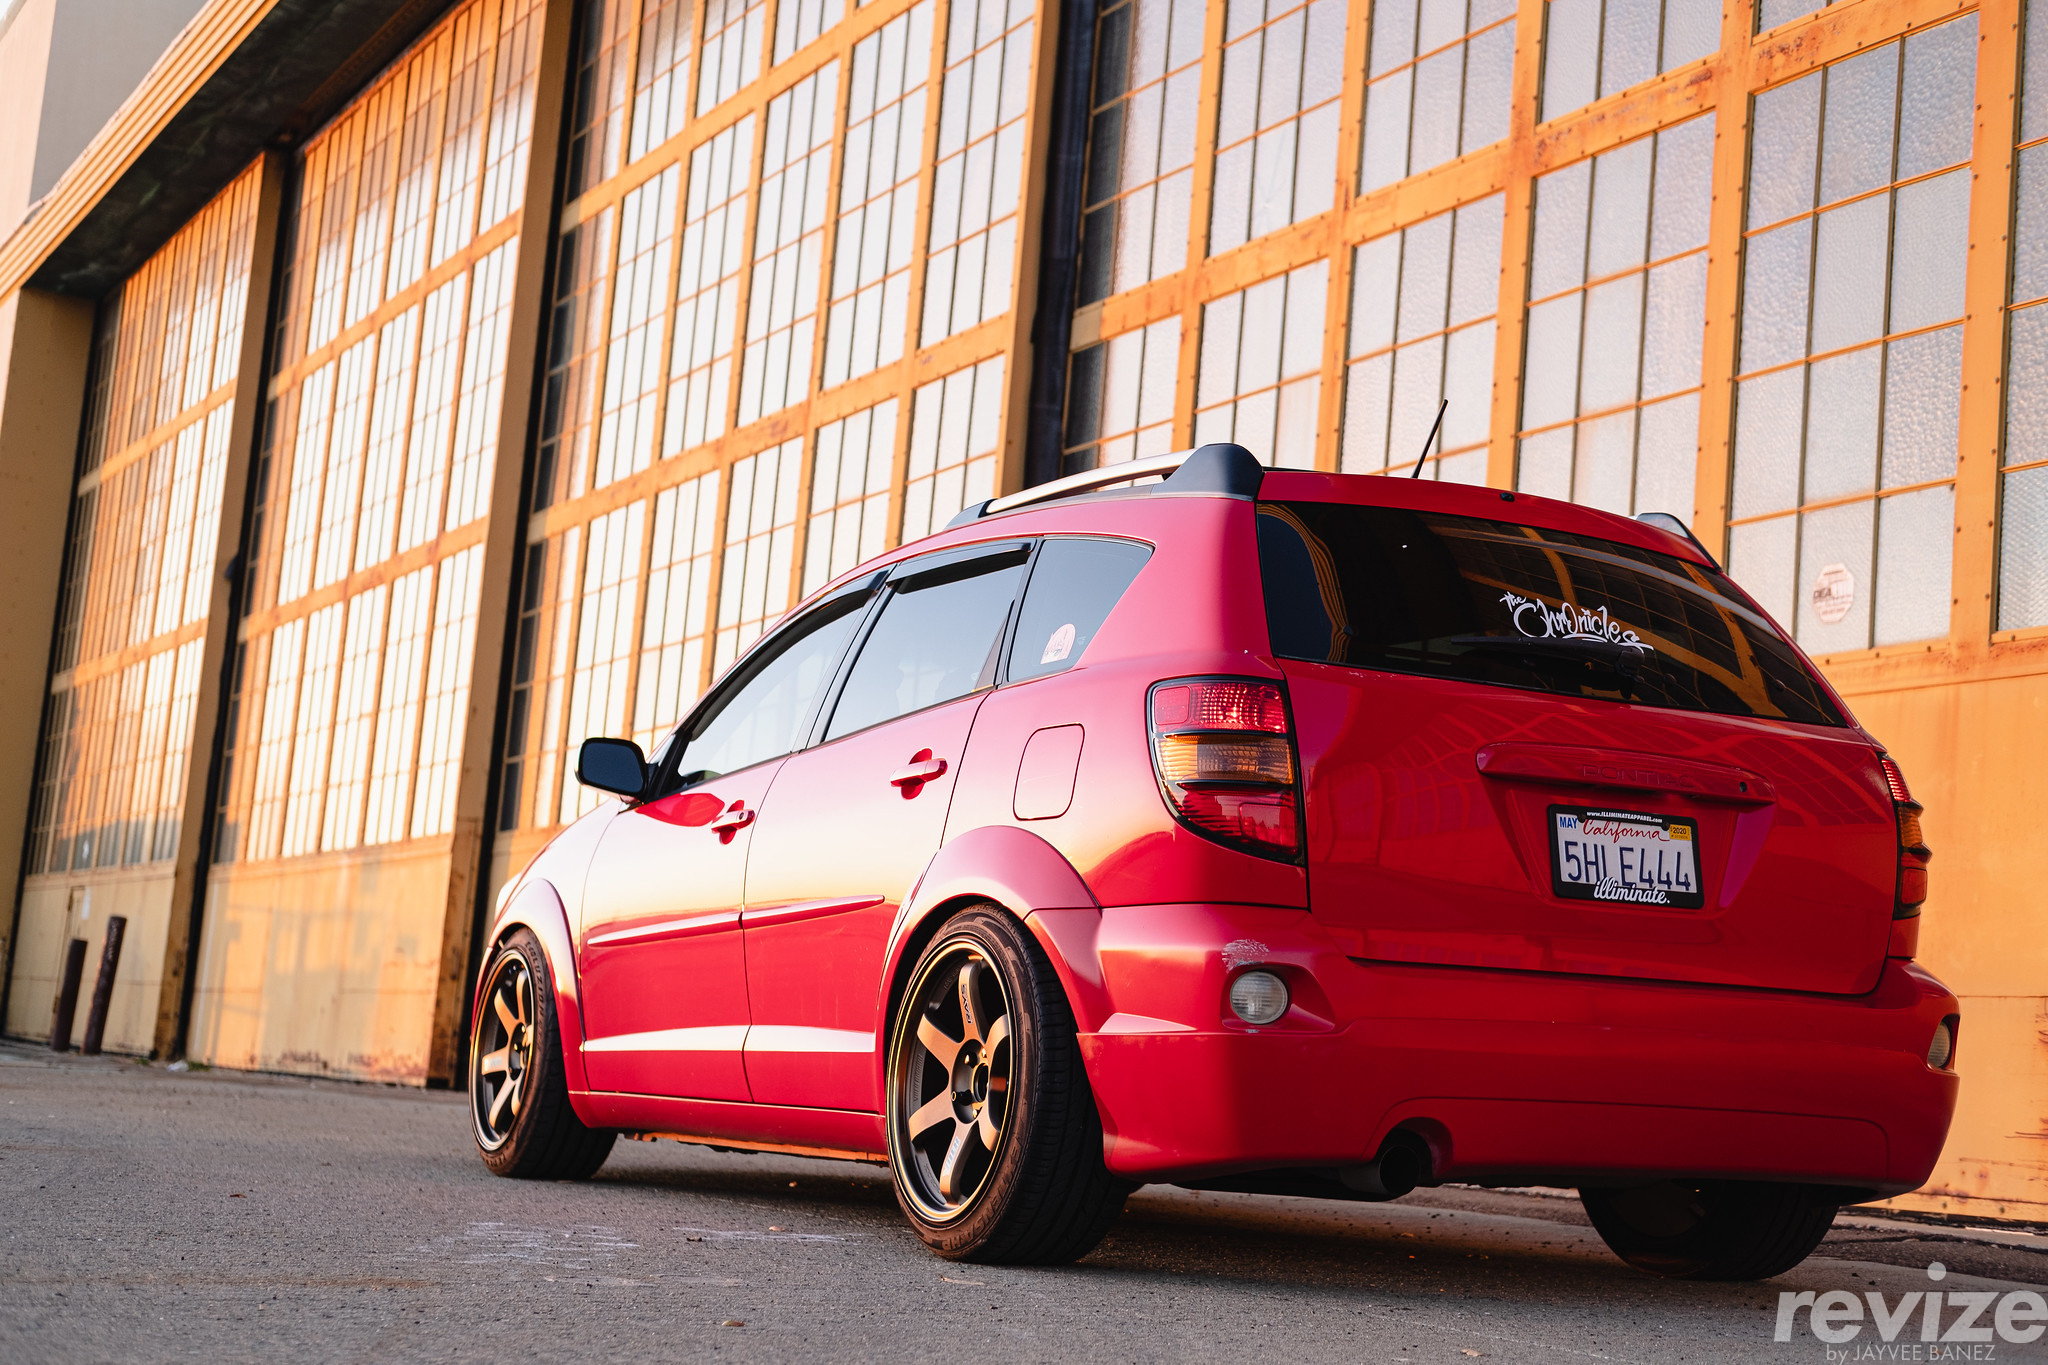
This is my favorite angle of the car. The alluring part of the wheels is how the spokes concave from the outer diameter of the wheel to the wheel hub. This angle makes me appreciate the fender flares even more as it makes the car look stout.
I ran this setup for a considerable amount of time. It wasn’t until I decided I wanted the rear bumper to flow even better with the front bumper and sideskirts. If I can accurately describe this: the rear bumper extension sharpens the bottom and rear body line while the front bumper and sideskirts round inwards. Hence again, the car would go through another change – final change at that…

At last, I promise this is the final final stage of the Vibe. I tried something that has never been tried before and it was adding Toyota Corolla front lips to the front bumper. It required some hopes, dreams, creative thinking, spray foam, bondo, and fiberglass. I had no clue what I was doing but I did something! My approach was to make it look OEM+. There was actually an OEM add-on from GM that went in conjunction with the rear fascia extension. It would be a 2-piece front bumper extension but it’s extremely rare and hard to find. The only person I know who has a complete OEM kit would be Ben Thompson from the GenVibe Facebook Group. He had his turbocharged Pontiac Vibe GT featured in a YouTube video on ThatDudeInBlue’s Channel. I digress but my aim was to replicate something as close to the kit.

The sideskirts were from a 1.5 generation Vibe (which is a facelift model of the first generation Vibe). These came stock on the facelift model so my pops grabbed one side from a junkyard and I purchased another side off of eBay. I hope that now you can understand the flow of the underside of the vehicle. The car fully kitted no longer has this bubbly or poof-y look to it anymore. It slopes downwards then sharply angles into the body. Exactly like the rear bumper extension, I painted the rest of the kit with paint supplied by Automotive Touchup!
Parts Overview:
- Exterior:
- Front – 03-04 Toyota Corolla Front Chin Spoiler
- Sideskirts – 05-08 Pontiac Vibe Sideksirts
- Rear – GM Rear Fascia Extension
- OEM Honda S2000 Antenna
- Window Visors
- Suspension:
- BC Racing Coilovers with Swift Springs (Front: 14K, Rear: 10K)
- SPC Rear Camber Shim
- Rays Engineering 17HEX Lug Nuts (12×1.5mm)
- Phase2Motortrend 5×100 to 5×114.3 Hub-centric Conversion Spacers (15mm and 25mm)
- Wheels and Tires:
- Rays Engineering TE37 OGs 18×9.5 +38, 5×114.3
- Tire Size: 235/40R18
Stage 4: Enjoying the car
This car offered me a wealth of knowledge and experience in various avenues such as: paint, wheels, tires, and suspension. Despite only manipulating essentially cosmetic features of the car, it gave me a base of how to keep a car clean and tidy. I was barely scratching the surface as I never messed with anything mechanical on the car. In the end, it was a super reliable Corolla wagon! Seriously! All I did to maintain this car was change the oil every 3,000 miles with synthetic engine oil!
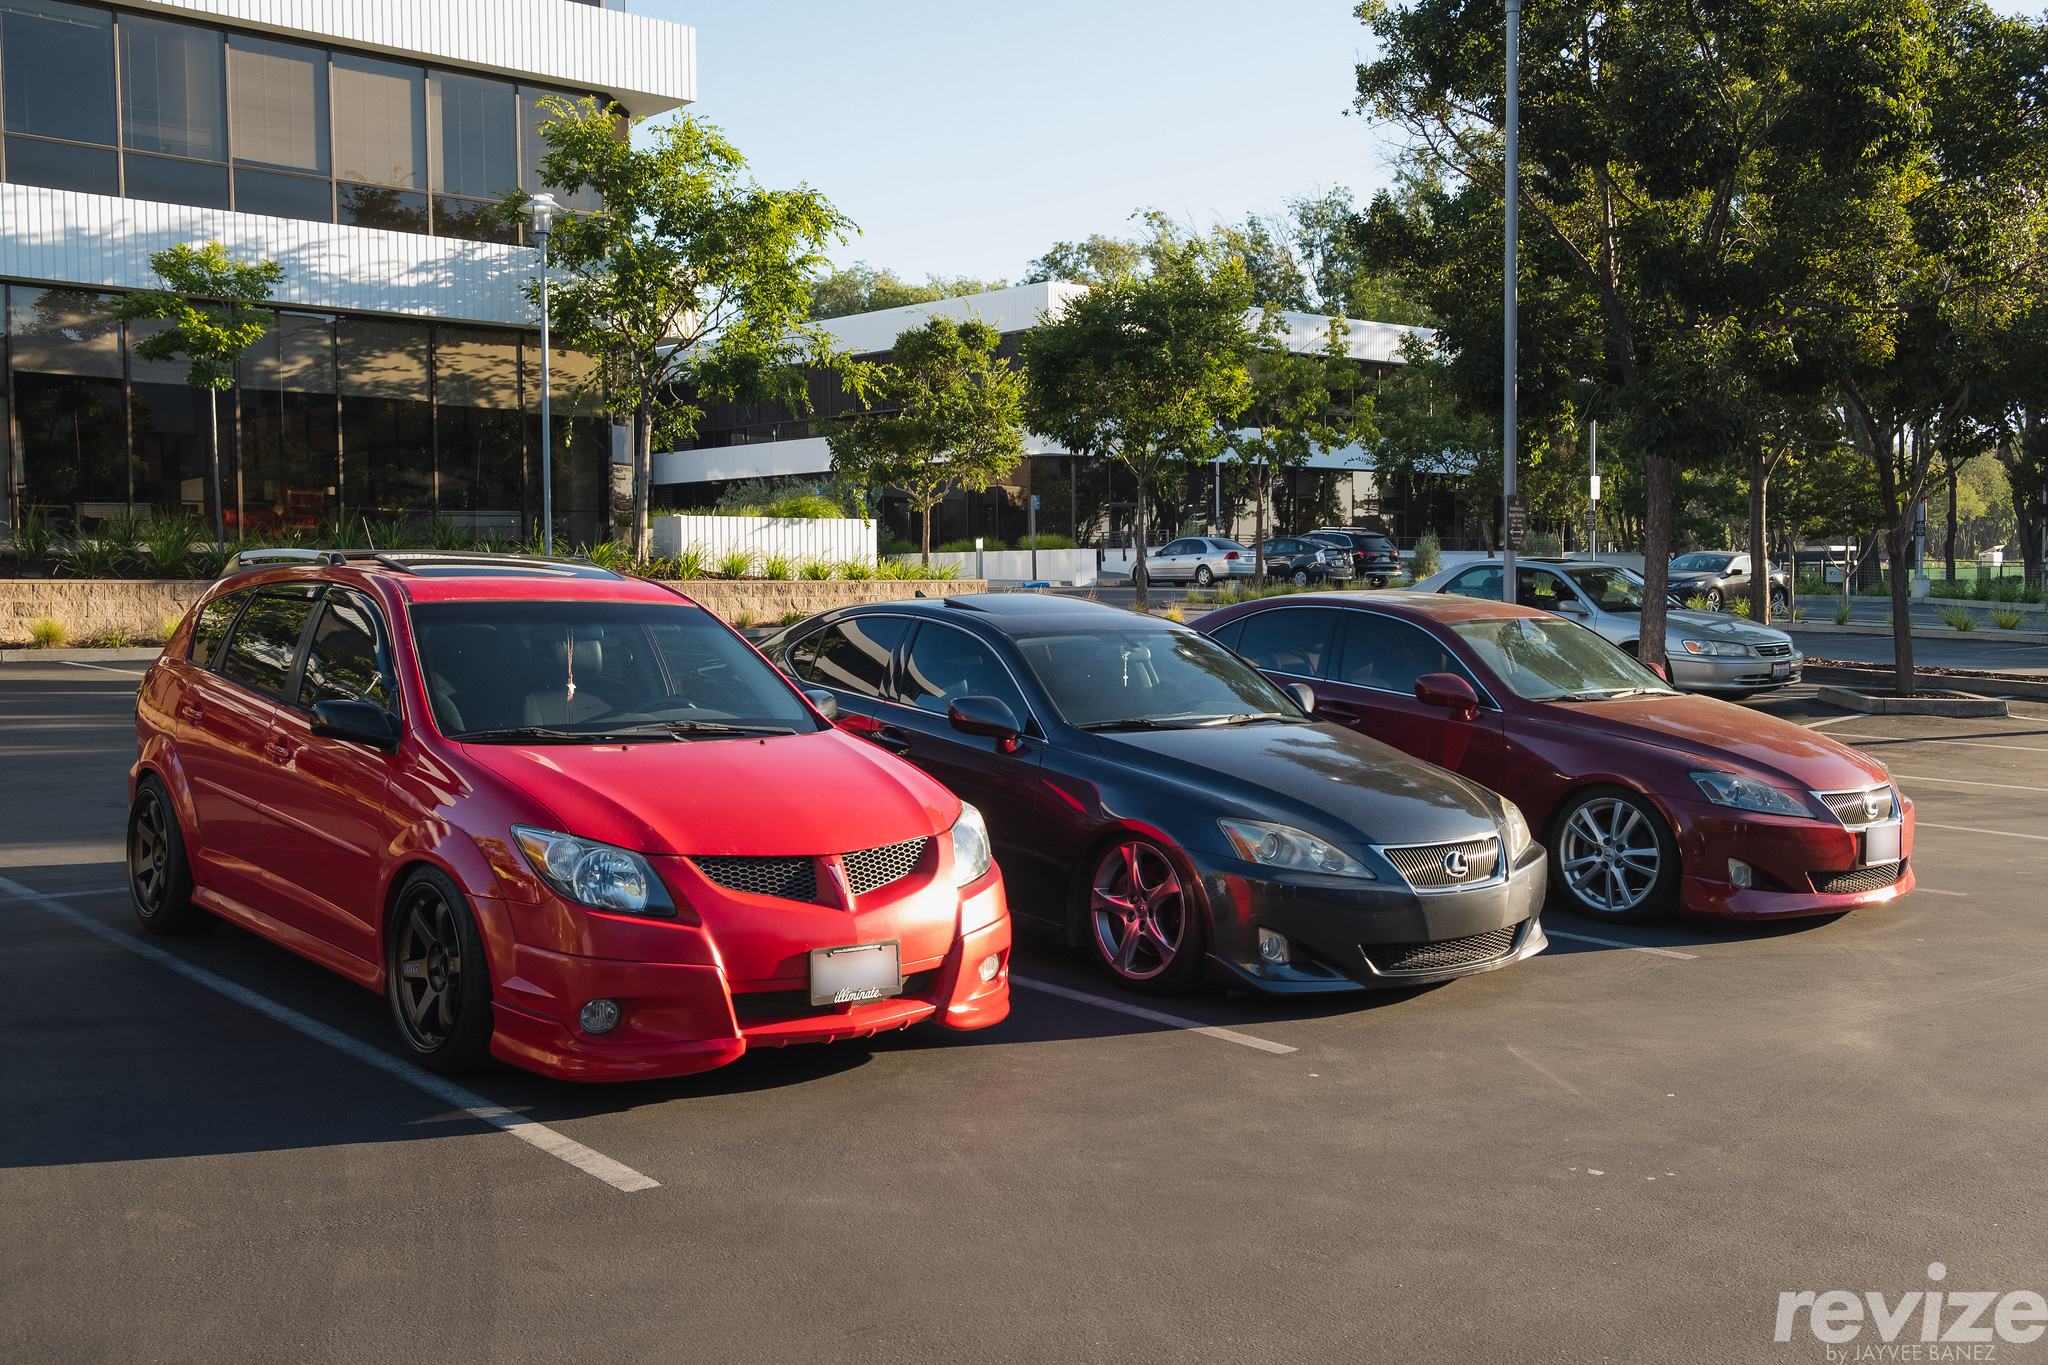
From left to right: My Pontiac Vibe, Michael’s Lexus IS350, and Marlon’s Lexus IS250
The car has came a long way since the key was transferred from my mom’s hands to mine. It’s been with me for most of my early-college years and it’s treated me good. It drove me to my first job, to my senior prom night, to Panther Beach in Santa Cruz, to Highway 9, to Alameda Point, to Sacramento, to various car meets all over the South Bay, to my favorite boba tea spots, to WekFest San Jose, and to my favorite viewpoints. Never in my life had I ever dreamed of customizing a Pontiac Vibe. It was never a chassis that I thought would look merely as cool. To me it was just a sexier looking Toyota Matrix with integrated roof racks.
Eventually, more friends started getting into customizing their cars like the ones in the picture above. They were just in the beginning stages: coilovers and maybe a catback exhaust. Didn’t I mention at the beginning that that’s what usually happens when people start tinkering with their cars? Even at that stage, lowering your car already gives you some style. Maybe in male fashion terms, it’s like you’re buying your first Levi’s trucker jacket, your first pair of Jordan’s, your first pair of raw selvedge jeans, or your first streetwear tee, etc.
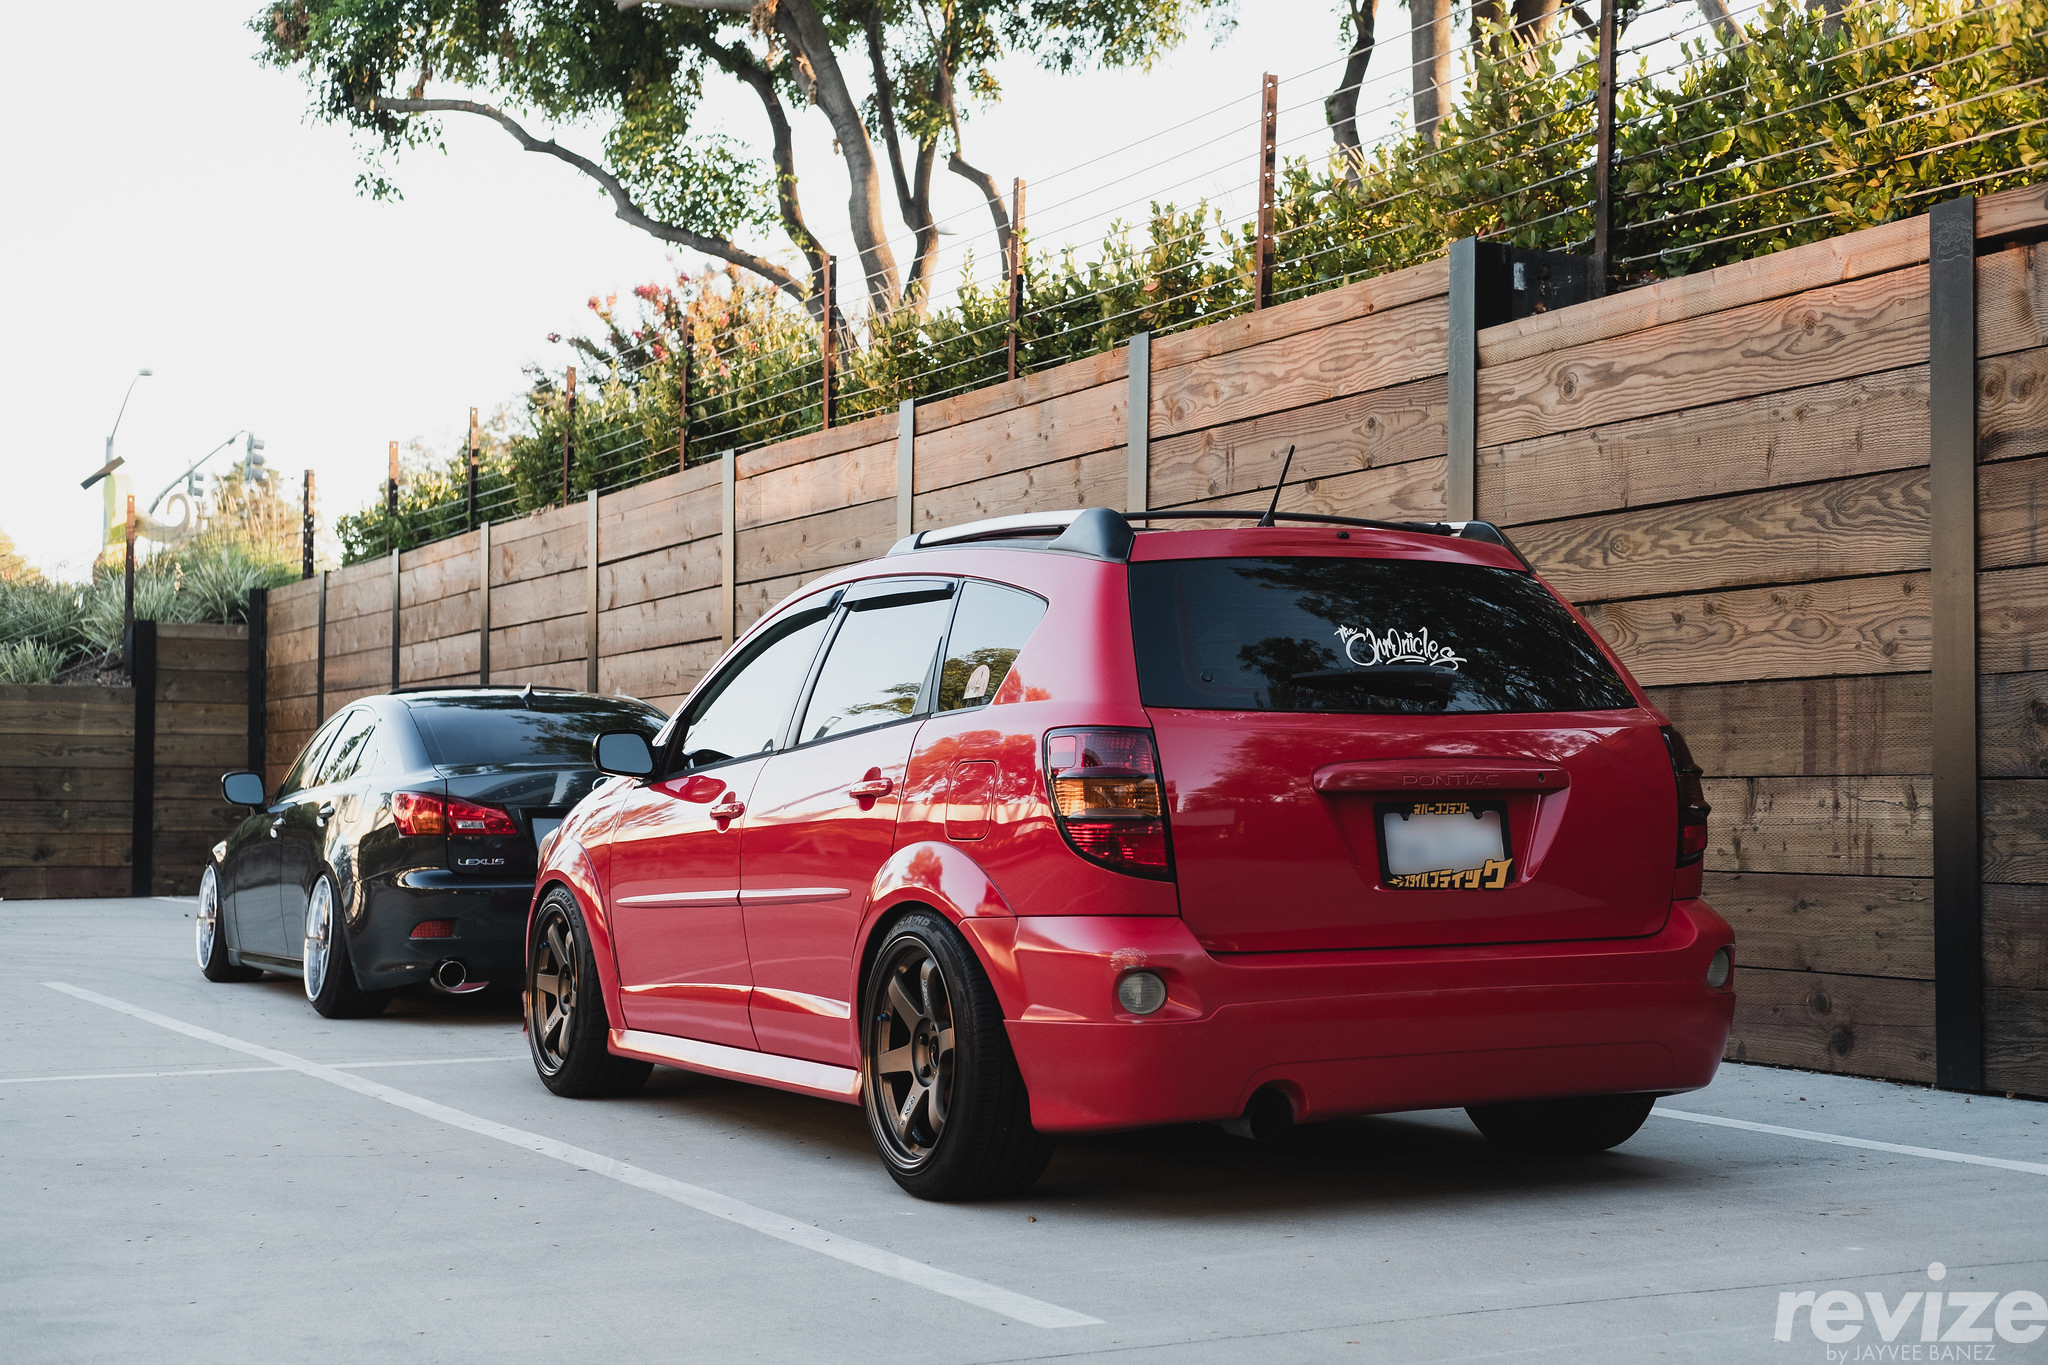
There’s nothing more therapeutic than riding in your whip with your friends in their respective whips; reverse parking into empty spots – possibly f*cking up the flow of traffic in the parking lot, then grabbing food or drinks to just talk about random things we got going on in our lives. I mean you don’t need to have cool cars to do it, it’s just a vibe – no pun intended, again. That’s something I miss dearly since I’ve moved to Colorado. It’s rare for me to really cruise around town without dealing with unregistered cars, impatient drivers, and unorthodox traffic lights. I’ve gone off track here but I’m iterating how much I took driving in California for granted…

The Vibe held a special place in my heart. I wouldn’t be where I am today if it weren’t for this very car. Here’s me with my car back in 2020. It’s always been on my bucket list to have a picture with my car. It reminds me of when I flipped through my parents’ thick photo albums and I’d occasionally catch a glimpse of my parents posing with their cars. I took one of Michael and his IS350 and I handed him my Ricoh GR II camera (which I miss a LOT). It may not look like it in this picture but I was proud of what I was able to accomplish on a chassis with its limited aftermarket support. It was a sweet little ride until I bought my Civic SI and handed the keys back to my mom. One half of the lip got destroyed so I had to remove the corresponding one; the clear coat started to peel again, and the vehicle is starting to show its age.
Well, that concludes the story of how I obtained my mom’s car and started customizing the hell out it. I hope you found this post: funny, entertaining, informational, and worth while! It’s a long post but my intention is to document something that may be of interest for car enthusiasts. Thanks for reading along and I hope 2025 treats you well!

Leave a comment